Complete Django Project
In this tutorial we’ll learn how to properly start a new Django project with a custom user model and add Gmail social authentication via django-allauth. I I believe these features are must haves in any new Django project in 2018.
- A custom user model is highly recommended in the official docs and allows for future customization.
- Adding social authentication via third-party services like Gmail, Facebook, and other services is also common. By using
django-allauthfrom the beginning, we can add social auth as needed.
I want to express my appreciation upfront to the work of Raymond Penners on
django-allauth as well as the open-source cookiecutter-django and demo-allauth-bootstrap projects.
The outline of our work is as follows:
- start a basic Django project
- add a pages app for the homepage
- implement a custom user model
- signup, login, logout
- install django-allauth
- get Google credentials
- update templates
Basic Django
This tutorial assumes your computer is already configured to use
Pipenv for virtual environments and has Python 3. If you need help, please review Chapter 1: Initial Setup of Django for Beginners which has a complete overview.
On the command line create a new directory
demo for our code on the Desktop, then install and activate Django in a new virtual environment. Create a new project called demo_project that we install in the current directory (don’t forget to include the period . in the command!), and start the server to confirm installation was successful.$ cd ~/Desktop
$ mkdir demo && cd demo
$ pipenv install django
$ pipenv shell
(demo) $ django-admin startproject demo_project .
(demo) $ python manage.py runserver
Note that we very intentionally did not run
migrate yet to create a new database. We must wait until the custom user model is configured before doing so for the first time. More on this shortly.
In a web browser navigate to http://127.0.0.1:8000/ and you should see the Django welcome page.

Pages app
Now it’s time for our homepage. I like to create a dedicated app for static pages like home, about, terms, privacy, etc. First stop the server with
Control+c and then run startapp to make a new app pages.(demo) $ python manage.py startapp pages
Add the new app to our
INSTALLED_APPS setting and also update the templates DIRS setting so we can use a project-level templates directory in the project.# demo_project/settings.py
INSTALLED_APPS = [
'django.contrib.admin',
'django.contrib.auth',
'django.contrib.contenttypes',
'django.contrib.sessions',
'django.contrib.messages',
'django.contrib.staticfiles',
'django.contrib.sites',
'pages', # new
]
TEMPLATES = [
...
'DIRS': [os.path.join(BASE_DIR, 'templates')],
...
]
Now make our new templates directory from the command line, add a
home.htmltemplate, and also add a urls.py file we’ll need in the new pages app.(demo) $ mkdir templates
(demo) $ touch templates/home.html
(demo) $ touch pages/urls.py
The homepage will be deliberately basic at this point: just a string of text.
<!-- templates/home.html -->
<h1>Homepage</h1>
We also need to update the project-level
urls.py file to “include” the pages app and then add the code for our pages/urls.py file, too.# demo_project/urls.py
from django.contrib import admin
from django.urls import include, path
urlpatterns = [
path('', include('pages.urls')),
path('admin/', admin.site.urls),
]
# pages/urls.py
from django.urls import path

from . import views

urlpatterns = [
    path('', views.HomePageView.as_view(), name='home'),
]
We’ve referenced a view called
HomePageView but have yet to create it. Let’s do that now. We can use Django’s class-based generic view TemplateView here.# pages/views.py
from django.views.generic import TemplateView
class HomePageView(TemplateView):
template_name = 'home.html'
Now run the server again.
(demo) $ python manage.py runserver
Refresh the browser at http://127.0.0.1:8000/ and our new homepage appears!

Custom User Model
Now we’ll configure a custom user model that simply extends the existing
Usermodel. That means it’s exactly the same but we have the ability to add fields to it in the future as needed–date of birth, location, gender, etc. If we did not use a custom user model upfront, it would be very difficult to make these changes. Hence why all new projects should use a custom user model.
There are four steps required to implement the new custom user model.
First, create a new app called
users. You probably need to stop the server with Control+c in order to run this command.(demo) $ python manage.py startapp users
Add the new app to our
INSTALLED_APPS setting and add a new setting for AUTH_USER_MODEL. This tells Django that instead of using the default User model look in our app users for the model called CustomUser and use that instead everywhere in our project.# demo_project/settings.py
INSTALLED_APPS = [
'django.contrib.admin',
'django.contrib.auth',
'django.contrib.contenttypes',
'django.contrib.sessions',
'django.contrib.messages',
'django.contrib.staticfiles',
'django.contrib.sites',
'users', # new
'pages',
]
AUTH_USER_MODEL = 'users.CustomUser' # new
Second we need to create our new
CustomUser model as well as a corresponding manager for it since all models have an underlying manager.# users/models.py
from django.contrib.auth.models import AbstractUser, UserManager
class CustomUserManager(UserManager):
pass
class CustomUser(AbstractUser):
objects = CustomUserManager()
Third, various forms in Django interact with the user especially around creating and changing users. We’ll update both the default
UserCreationForm and UserChangeForm to point to our new CustomUser model.
Create a
forms.py file in the users app.(demo) $ touch users/forms.py
Then add the following code.
# users/forms.py
from django import forms
from django.contrib.auth.forms import UserCreationForm, UserChangeForm
from .models import CustomUser

class CustomUserCreationForm(UserCreationForm):

    class Meta(UserCreationForm):
        model = CustomUser
        fields = ('username', 'email')

class CustomUserChangeForm(UserChangeForm):

    class Meta:
        model = CustomUser
        fields = UserChangeForm.Meta.fields
The fourth and final step is to update
admin.py. The admin app gives us the power to create, modify, and delete users. Therefore we need to update it, too, to use CustomUser throughout.
Here’s the code.
# users/admin.py
from django.contrib import admin
from django.contrib.auth import get_user_model
from django.contrib.auth.admin import UserAdmin

from .forms import CustomUserCreationForm, CustomUserChangeForm
from .models import CustomUser

class CustomUserAdmin(UserAdmin):
    model = CustomUser
    add_form = CustomUserCreationForm
    form = CustomUserChangeForm

admin.site.register(CustomUser, CustomUserAdmin)
And we’re done. Now we can create our new database for the first time.
(demo) $ python manage.py makemigrations users
(demo) $ python manage.py migrate users
To confirm everything worked let’s create a
superuser account and login to the admin.(demo) $ python manage.py createsuperuser
Start up the server with
python manage.py runserver and then navigate to http://127.0.0.1:8000/admin.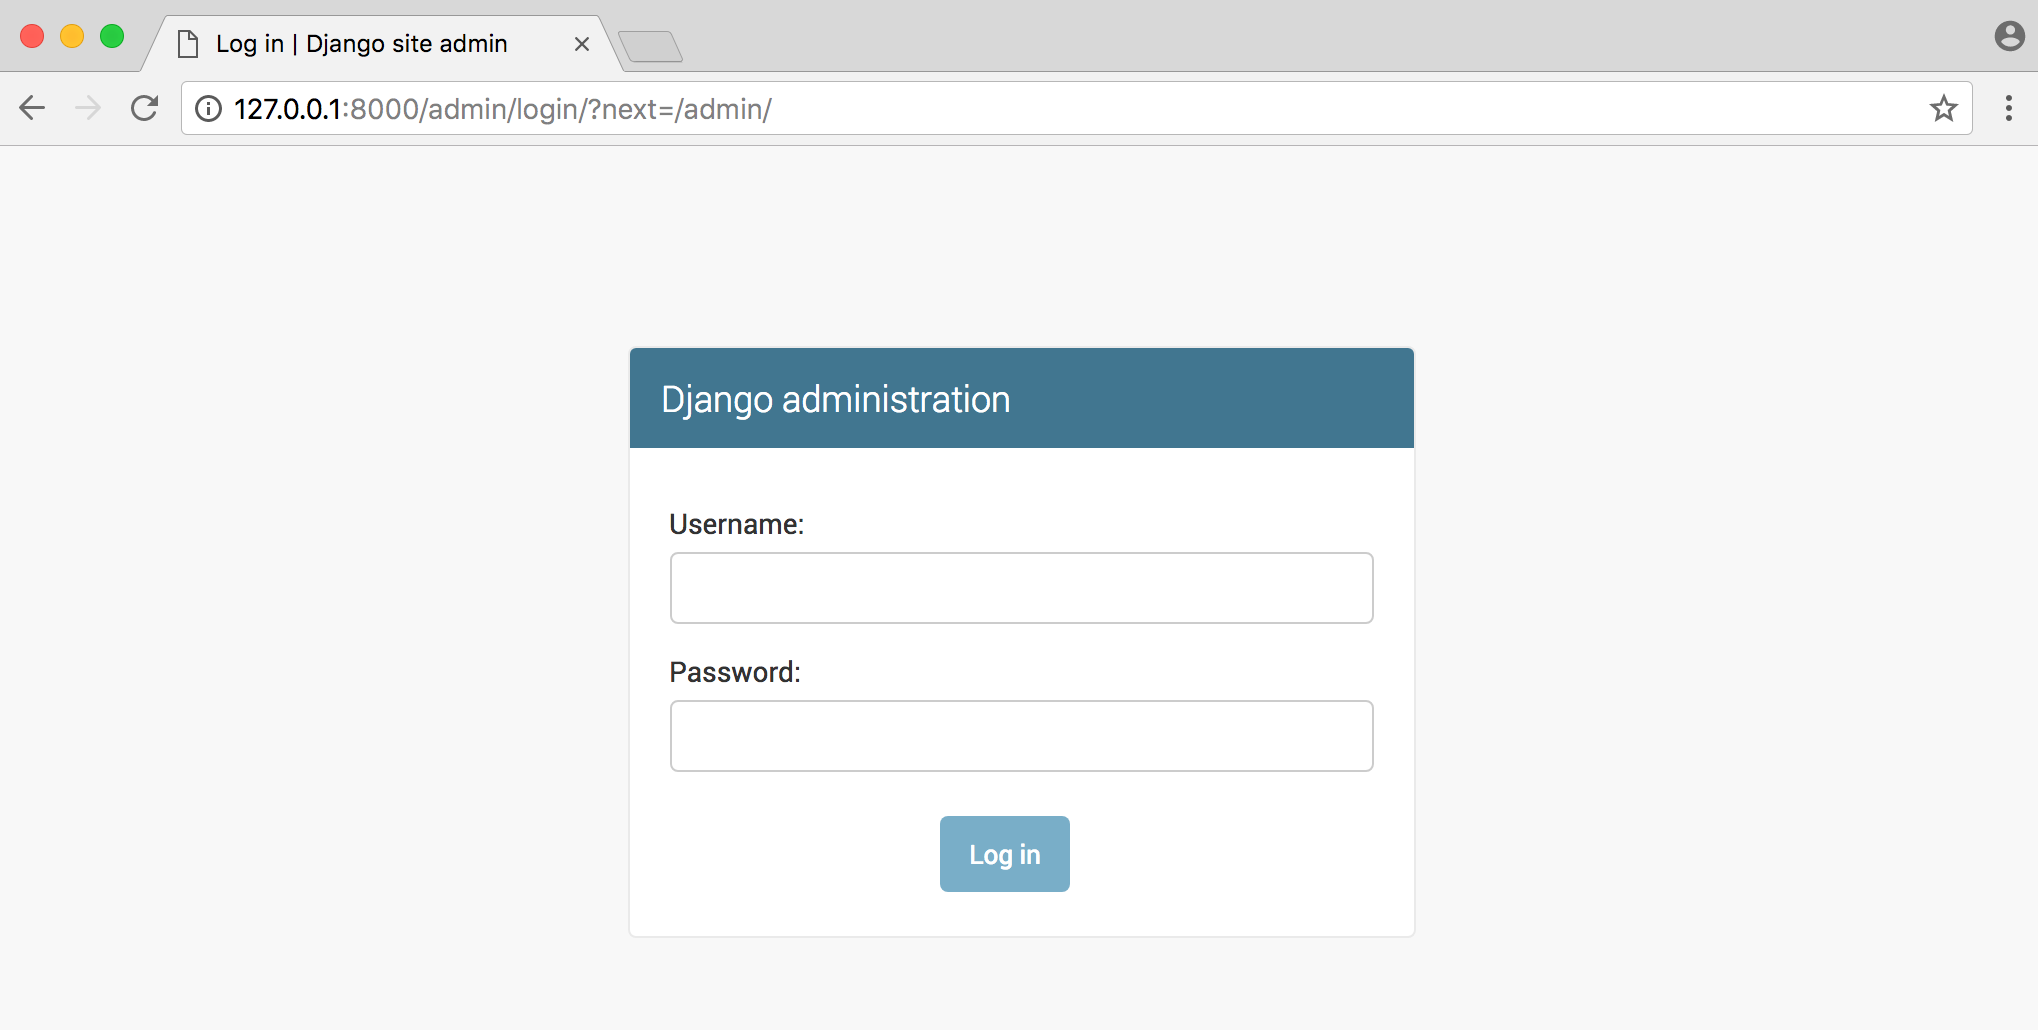
Log in with your superuser credentials.
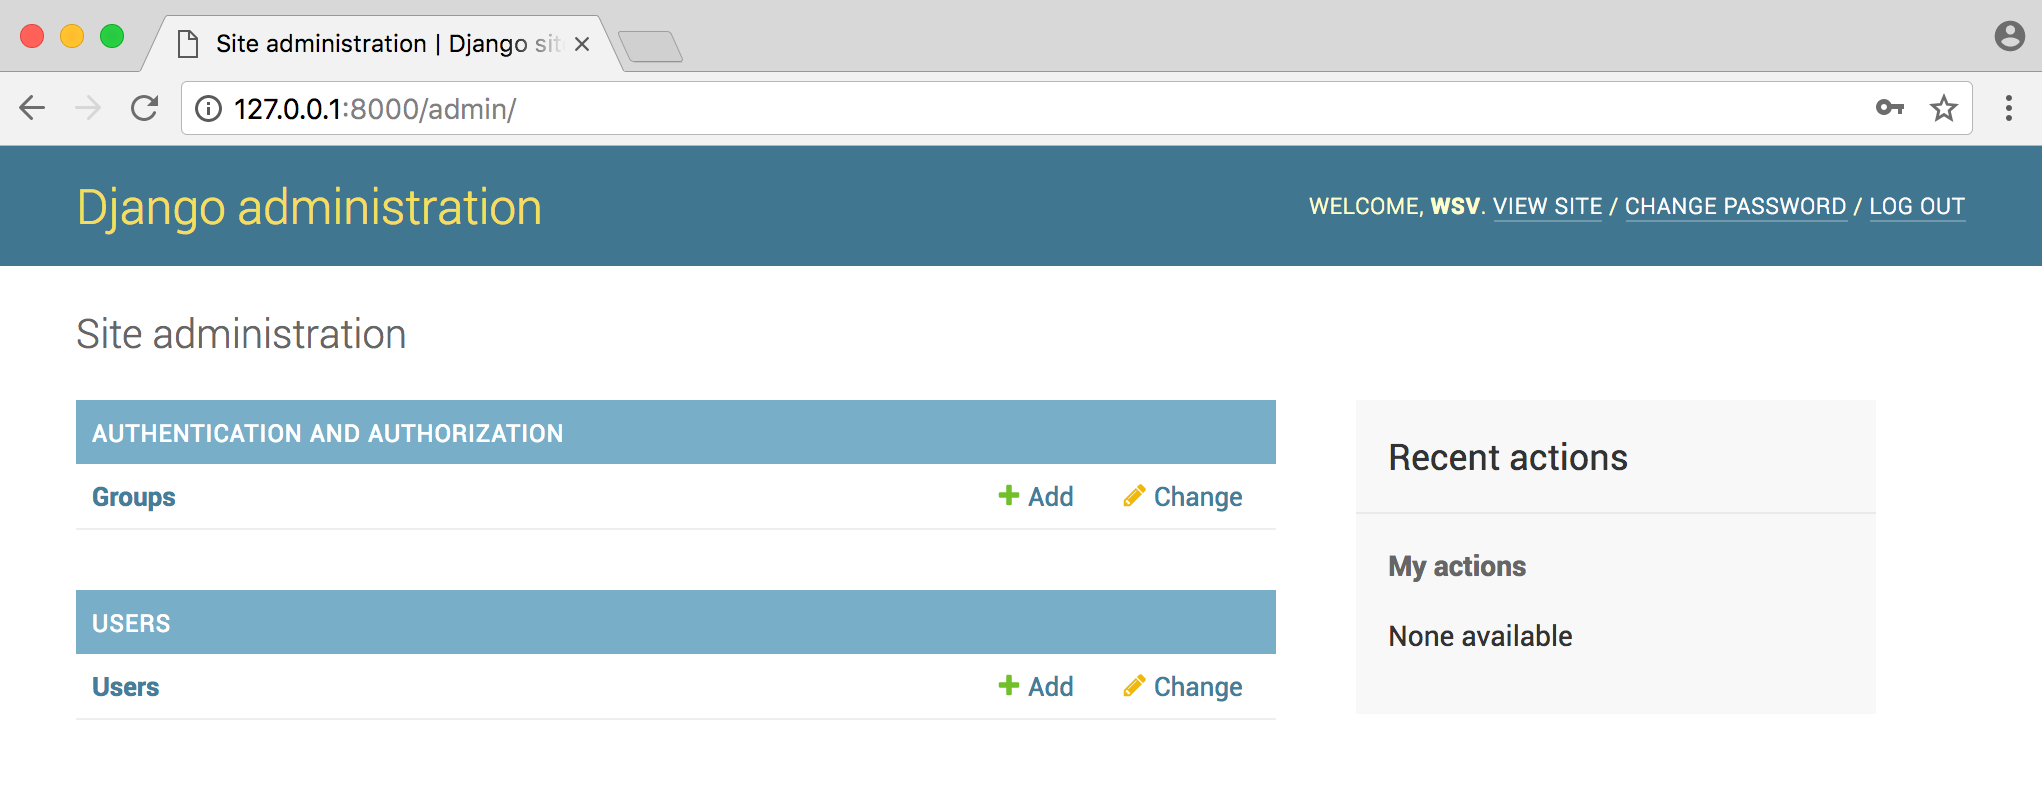
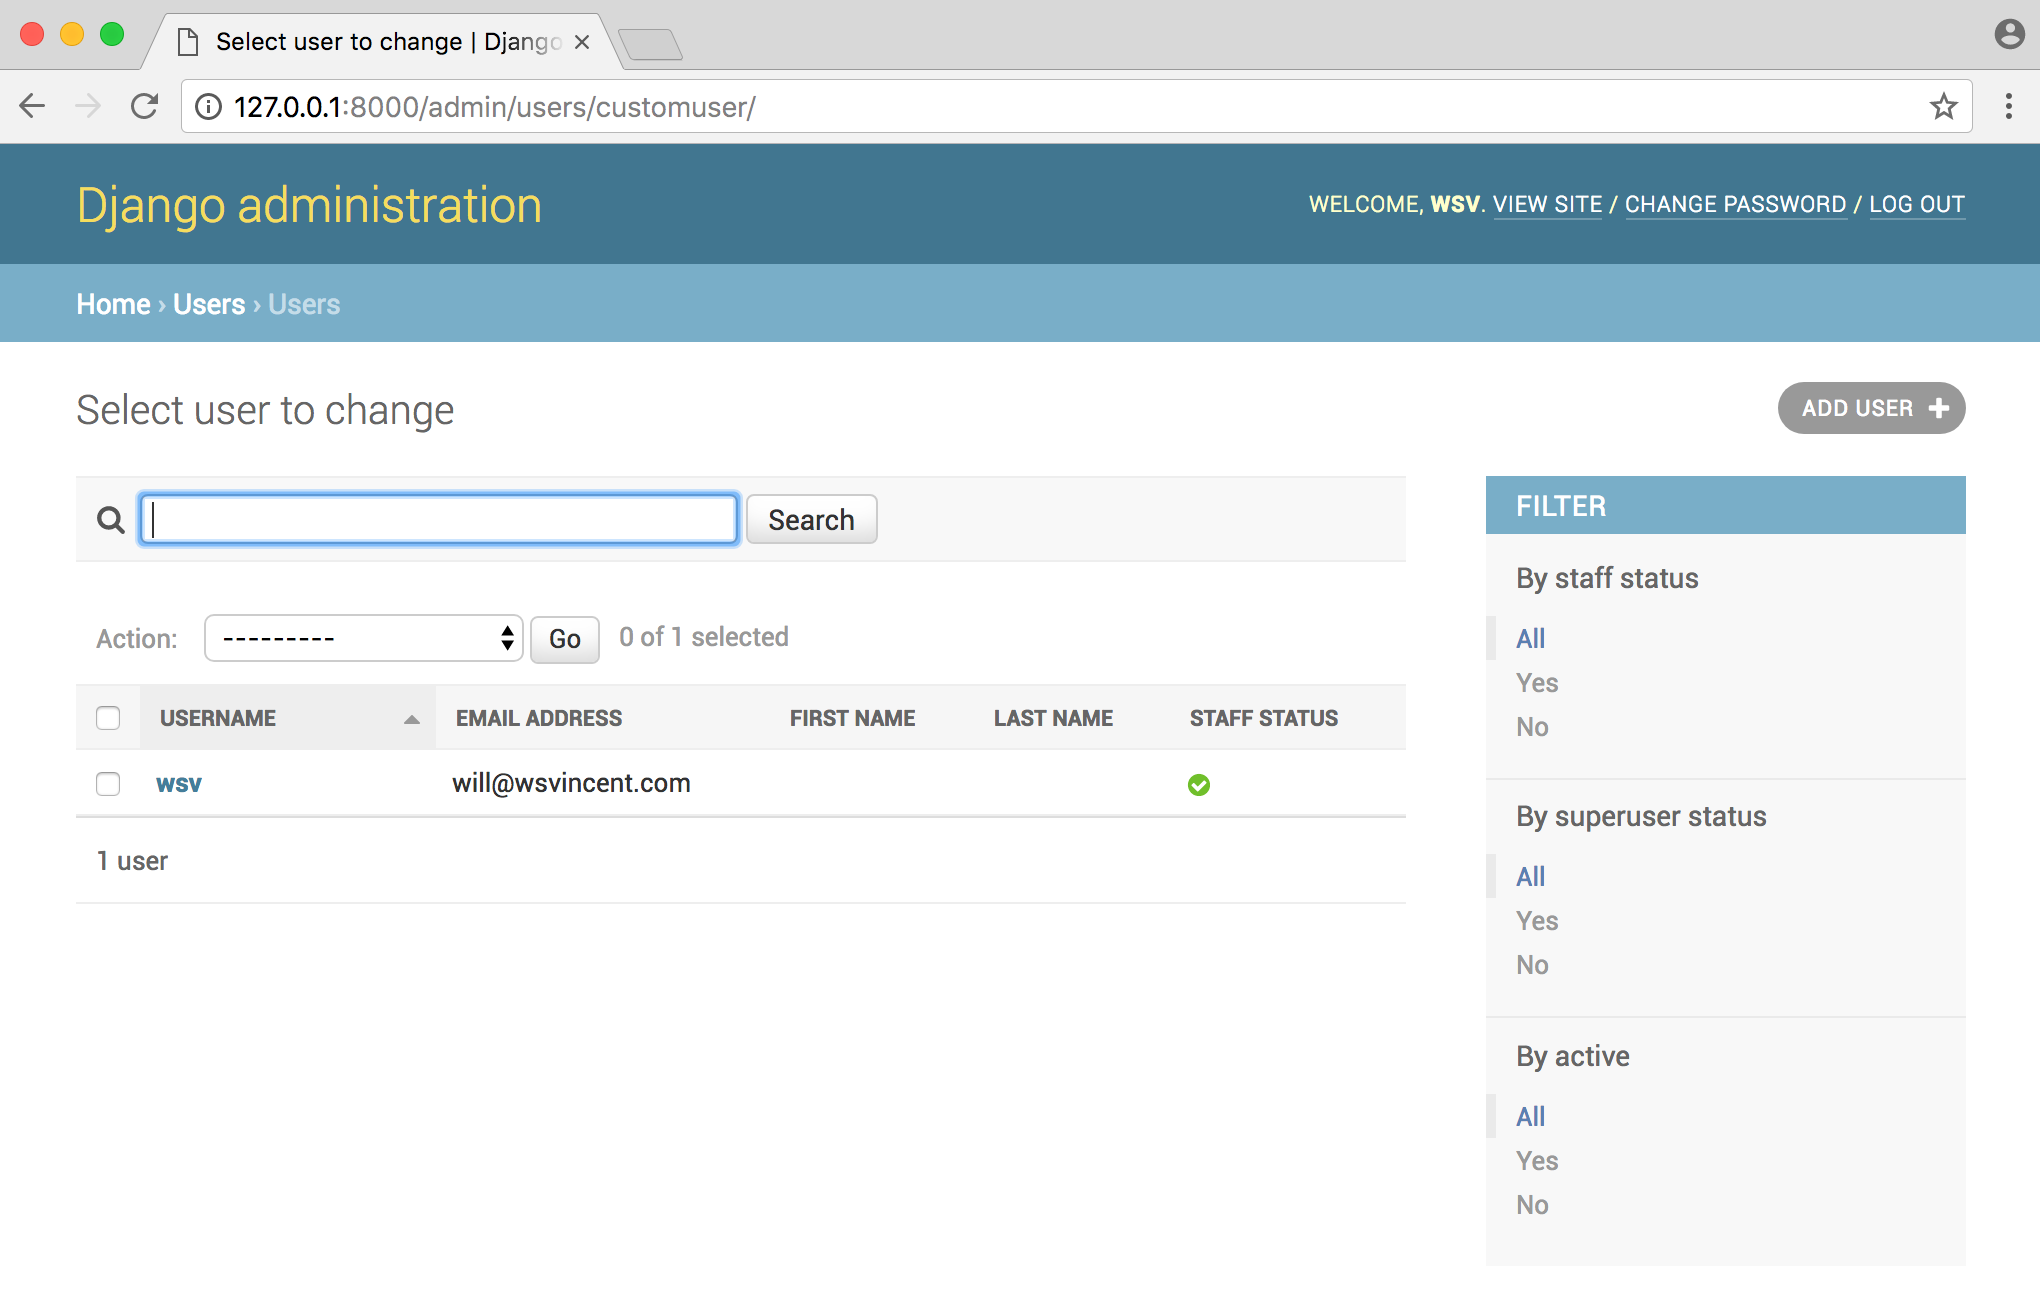
Click on “Users” and you should see your superuser account.
Signup, login, logout
Our goal in this section is to update the homepage so it has working links for sign up, login, and logout functionality. We have yet to update our project-level
urls.py for the new users app so let’s do that now. We also want to add Django’s built-in auth module.# demo_project/urls.py
from django.contrib import admin
from django.urls import include, path
urlpatterns = [
path('', include('pages.urls')),
path('users/', include('users.urls')), # new
path('users/', include('django.contrib.auth.urls')), # new
path('admin/', admin.site.urls),
]
When a user logs in or logs out Django needs us to specify where to redirect them. Let’s send everyone to the homepage which has a named url of
home. In the settings.py file add the following two lines at the bottom.# demo_project/settings.py
LOGIN_REDIRECT_URL = 'home'
LOGOUT_REDIRECT_URL = 'home'
Now update our existing homepage so that if a user is logged in it will show a personalized greeting and logout link, otherwise it will have signup and log in links.
<!-- templates/home.html -->
<h1>Django Login Mega-Tutorial</h1>
{% if user.is_authenticated %}
<p>Hi {{ user.username }}
<p><a href="{% url 'logout' %}">Log out</a></p>
{% else %}
<p><a href="{% url 'signup' %}">Sign Up</a></p>
<p><a href="{% url 'login' %}">Log In </a></p>
{% endif %}
For our login template, we need to create it at
templates/registration/login.html which is where Django looks by default.(demo) $ mkdir templates/registration
(demo) $ touch templates/registration/login.html
Then update it as follows:
<!-- templates/registration/login.html -->
<h2>Login</h2>
<form method="post">
  {% csrf_token %}
  {{ form.as_p }}
  <button type="submit">Login</button>
</form>
Now for our sign up template. Since this does not come built-in to Django we need to create and configure our template, views, urls by hand. let’s start with the template.
(demo) $ touch templates/signup.html
The signup form uses a
csrf_token for security.<!-- templates/signup.html -->
<h2>Sign up</h2>
<form method="post">
{% csrf_token %}
{{ form.as_p }}
<button type="submit">Sign up</button>
</form>
Create a
users/urls.py file.(demo) $ touch users/urls.py
It will reference just our sign up view for now.
# users/urls.py
from django.urls import path
from . import views

urlpatterns = [
    path('signup/', views.SignUp.as_view(), name='signup'),
]
The view will extend
CreateView and specify our CustomUserCreationForm, redirects to login upon submission, and uses our signup.html template.# users/views.py
from django.urls import reverse_lazy
from django.views import generic
from .forms import CustomUserCreationForm
class SignUp(generic.CreateView):
form_class = CustomUserCreationForm
success_url = reverse_lazy('login')
template_name = 'signup.html'
Now we can try our links out. Start up the server with
python manage.py runserver and navigate to http://127.0.0.1:8000/. Refresh the page if you don’t see the changes right away.
Click on the “logout” link which will redirect you to the logged-out version of the homepage.

Try clicking on the “Sign Up” link.

Create a new account and you’ll be redirected to the login page.

Log in and you’ll be redirected to the homepage. My new account was called
testuser.
As the final confirmation let’s go into the admin to see both of our users. Navigate to http://127.0.0.1:8000/admin/.
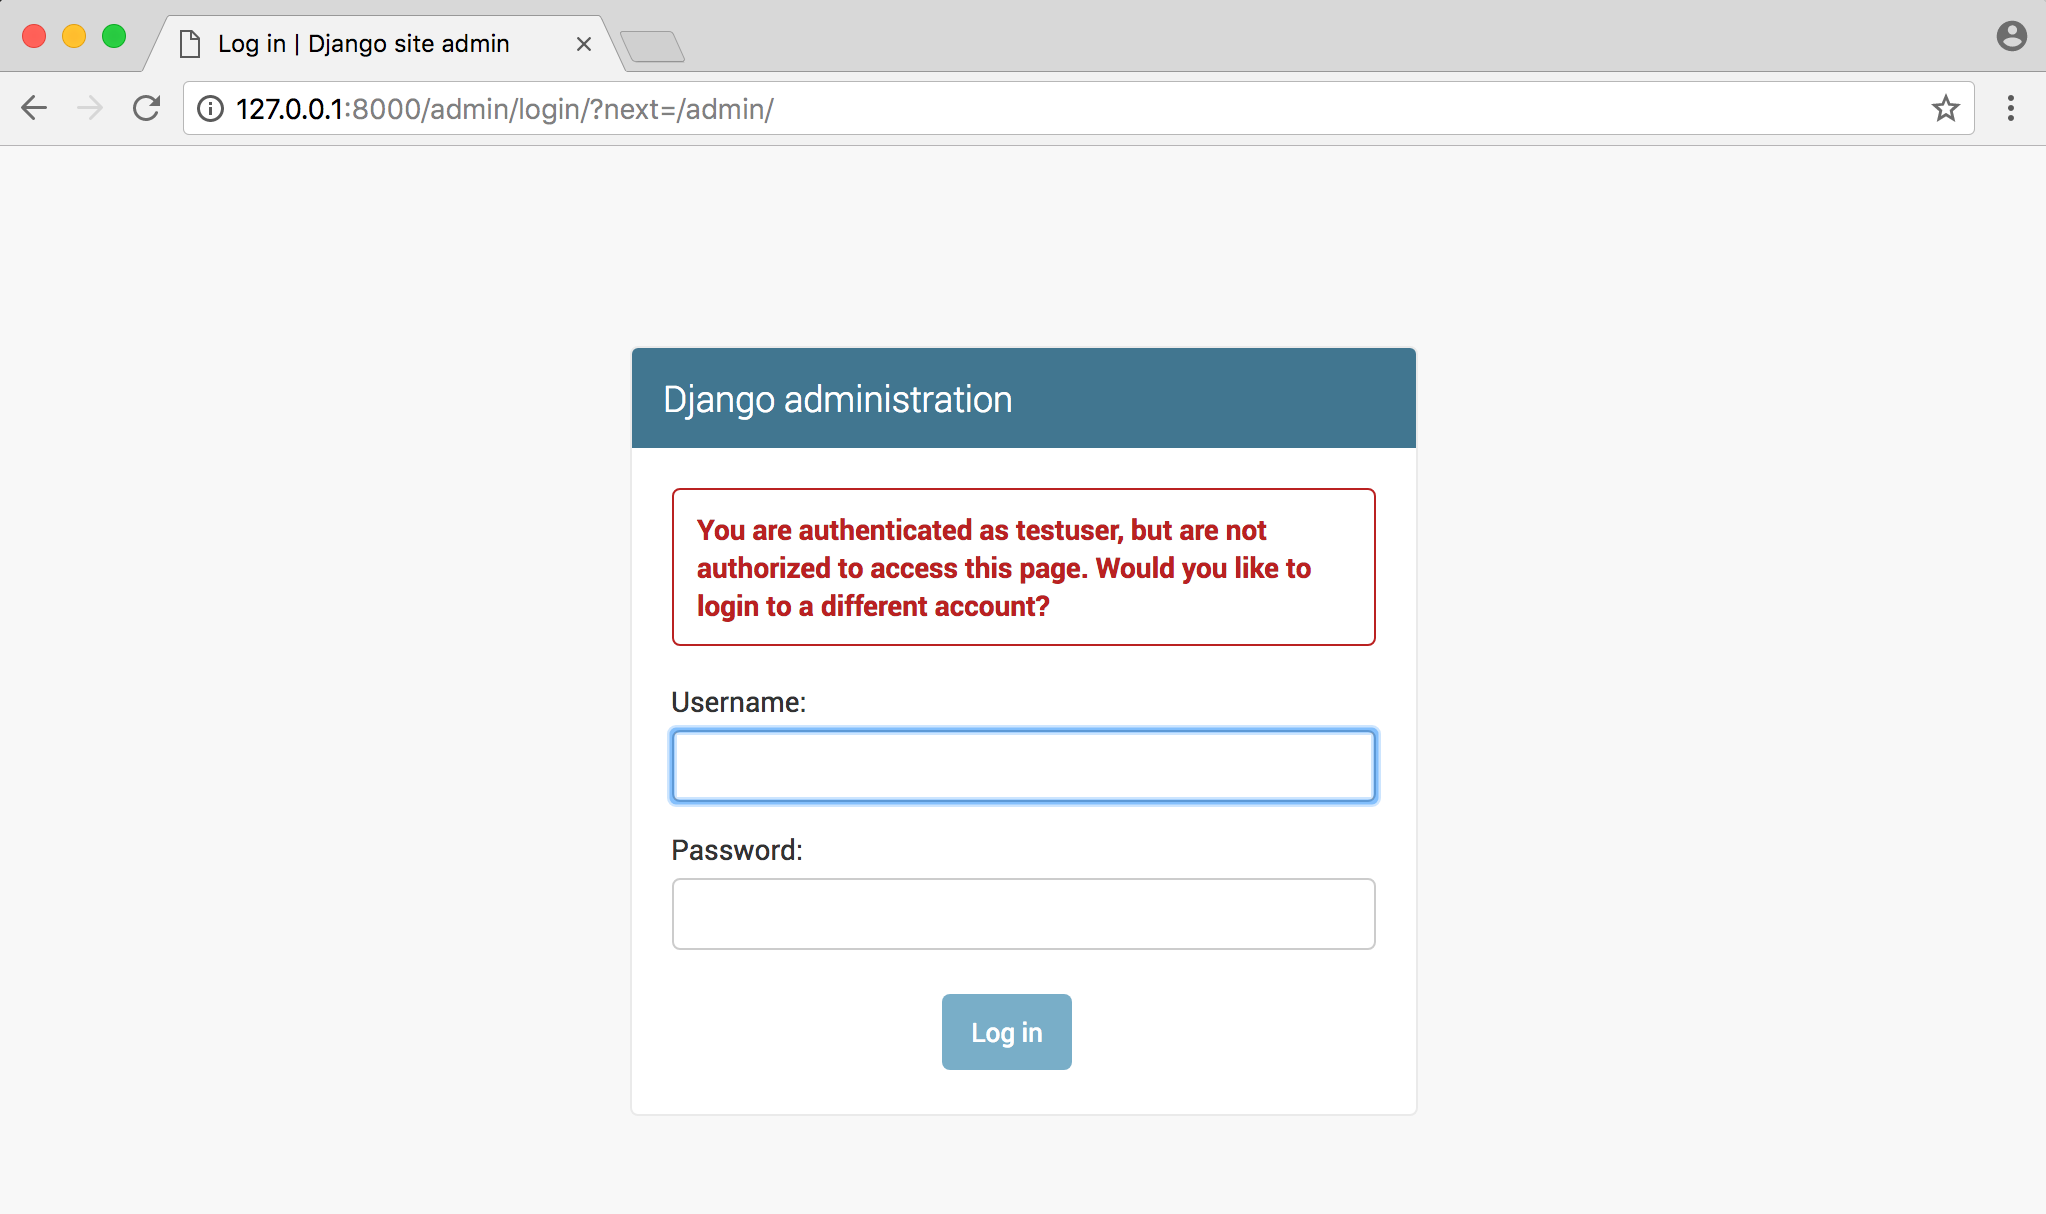
Oops! We have two users but only one–our superuser–can access the admin. This is a common gotcha. No worries; login with your superuser account here. Then click on “Users”.
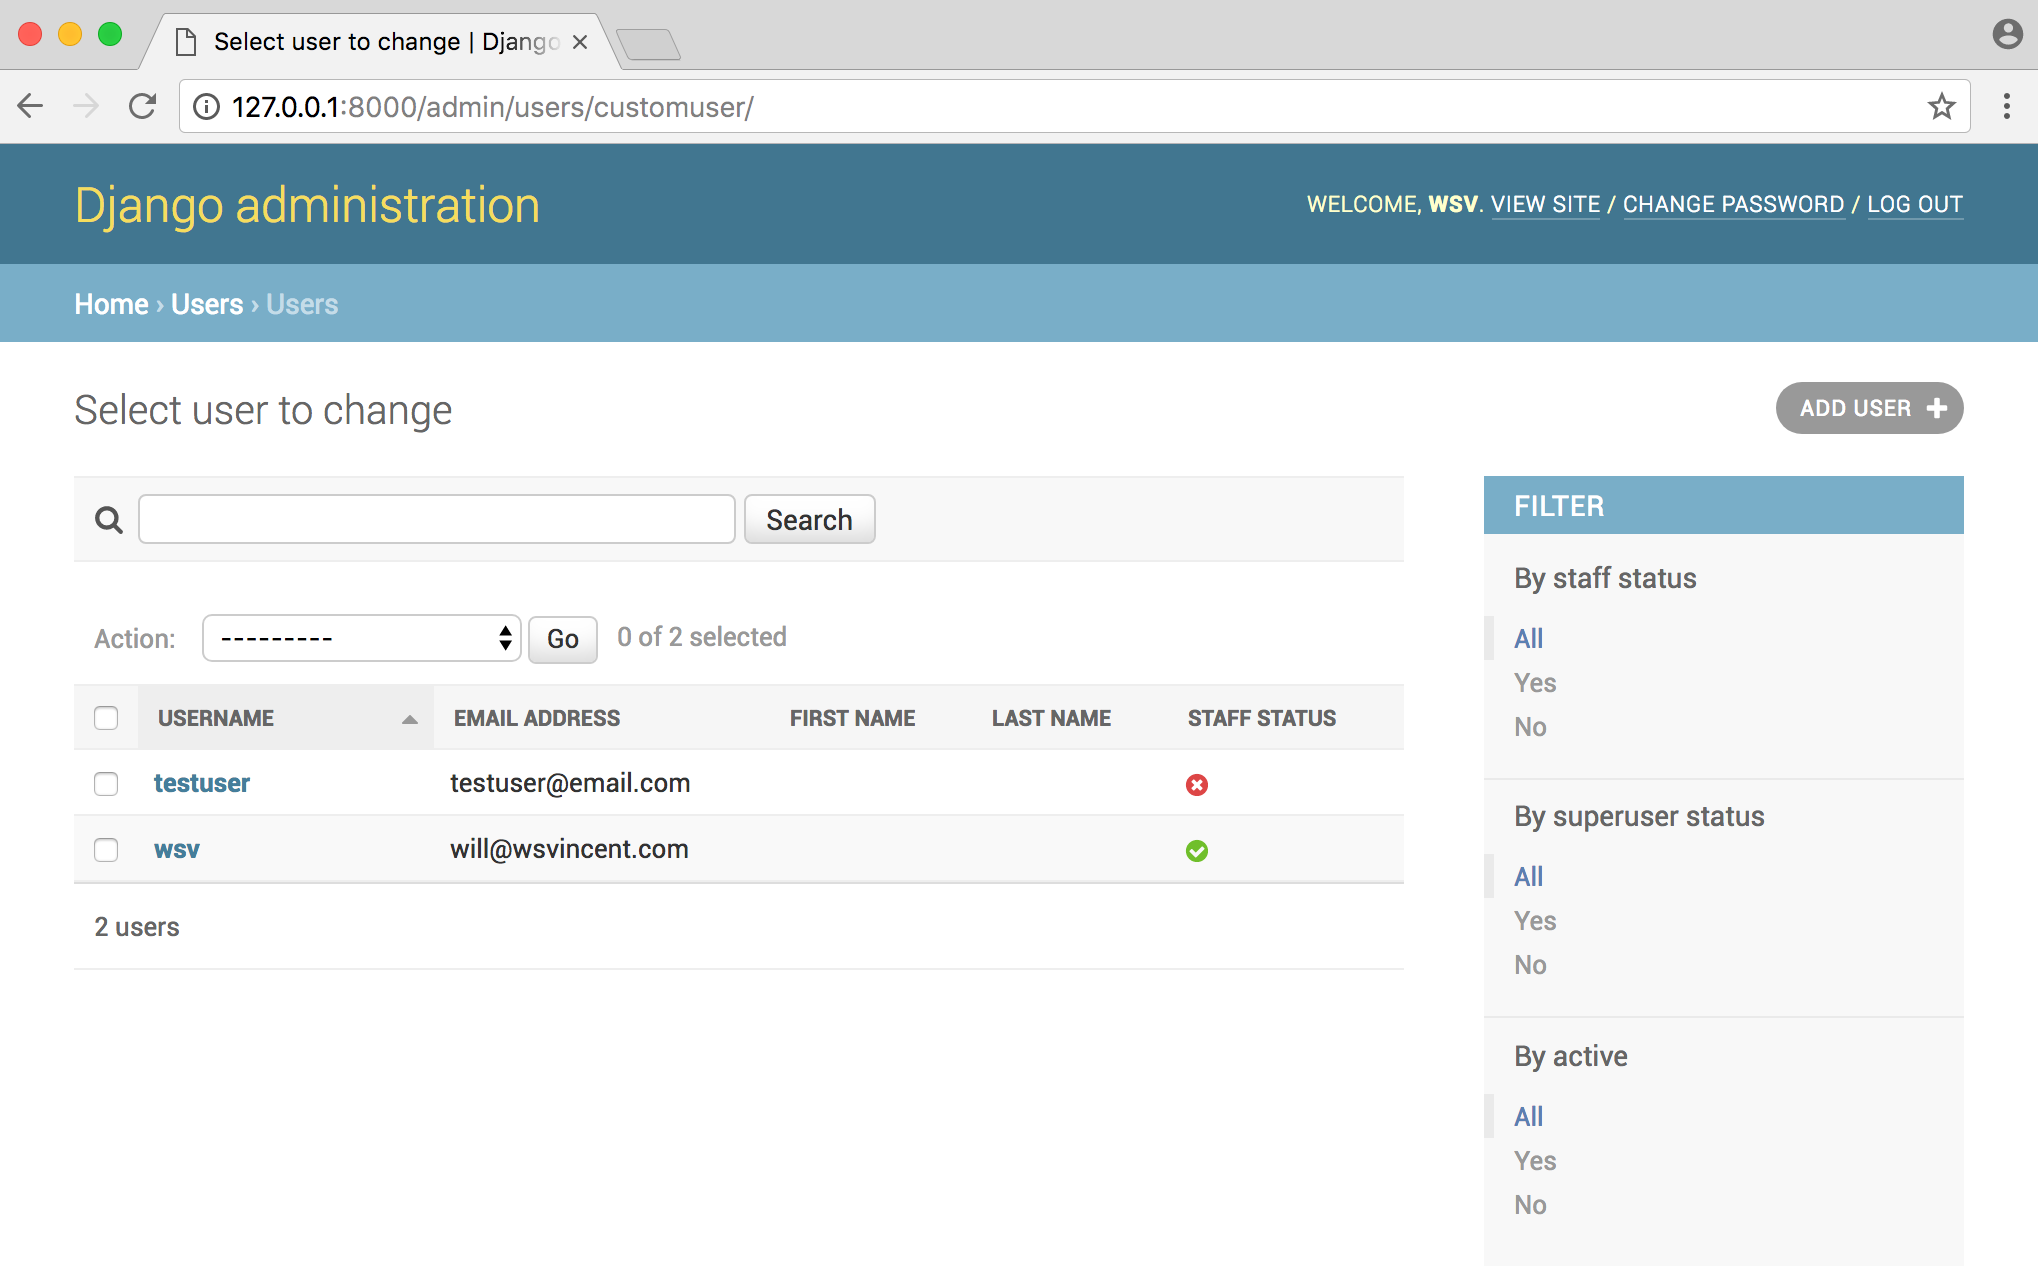
So far so good. Now let’s integrate
django-allauth so our users can signup in one click with a third-party service like Gmail.Django allauth
The first step is to install
django-allauth using Pipenv.(demo) $ pipenv install django-allauth
There are a number of changes we need to make in our
settings.py file. Let’s start with INSTALLED_APPS: Allauth relies on the built-in sites app but we need to add it ourselves as it no longer comes installed by default. We also add three specific allauth apps as well as one for Google.
The order matters here: add the
django-allauth config below the Django default apps but above our own apps.# demo_project/settings.py
INSTALLED_APPS = [
'django.contrib.admin',
'django.contrib.auth',
'django.contrib.contenttypes',
'django.contrib.sessions',
'django.contrib.messages',
'django.contrib.staticfiles',
'django.contrib.sites', # new
'allauth', # new
'allauth.account', # new
'allauth.socialaccount', # new
'allauth.socialaccount.providers.google', # new
'users',
'pages',
]
Now at the bottom of the file we need to add some more configs. First we set our
AUTHENTICATION_BACKENDS to use the existing ModelBackend so users can log in to the admin site. We also add allauth’s specific AuthenticationBackend. And since we’ll use the Sites app for configuring each 3rd party provider in the admin app, we also add a SITE_ID. Finally we want to store the user’s email address but not require a username so we add config for ACCOUNT_EMAIL_REQUIRED and ACCOUNT_USERNAME_REQUIRED.# demo_project/settings.py
AUTHENTICATION_BACKENDS = (
"django.contrib.auth.backends.ModelBackend",
"allauth.account.auth_backends.AuthenticationBackend",
)
SITE_ID = 1
ACCOUNT_EMAIL_REQUIRED = True
ACCOUNT_USERNAME_REQUIRED = False
Now we need to update our project-level
urls.py file. We’ll mimic the Allauth docs and include it at accounts/. Note that we also are removing the inclusion of the default auth module which was there earlier.# demo_project/urls.py
from django.contrib import admin
from django.urls import include, path
urlpatterns = [
path('', include('pages.urls')),
# Django Admin
path('admin/', admin.site.urls),
# User management
path('users/', include('users.urls')),
path('accounts/', include('allauth.urls')), # new
]
We haven’t made any model changes at this point but we have made some dramatic changes to our Installed Apps so it’s a good time to migrate and update our database to reflect the changes.
(demo) $ python manage.py migrate
Google credentials
To allow users to log in with their Gmail credentials we need to register our new website with Google. Go to the Google Developers Console and enter the name of your new project. I’ve called this one “Django Login Mega-Tutorial.” The click on the “Create” button.
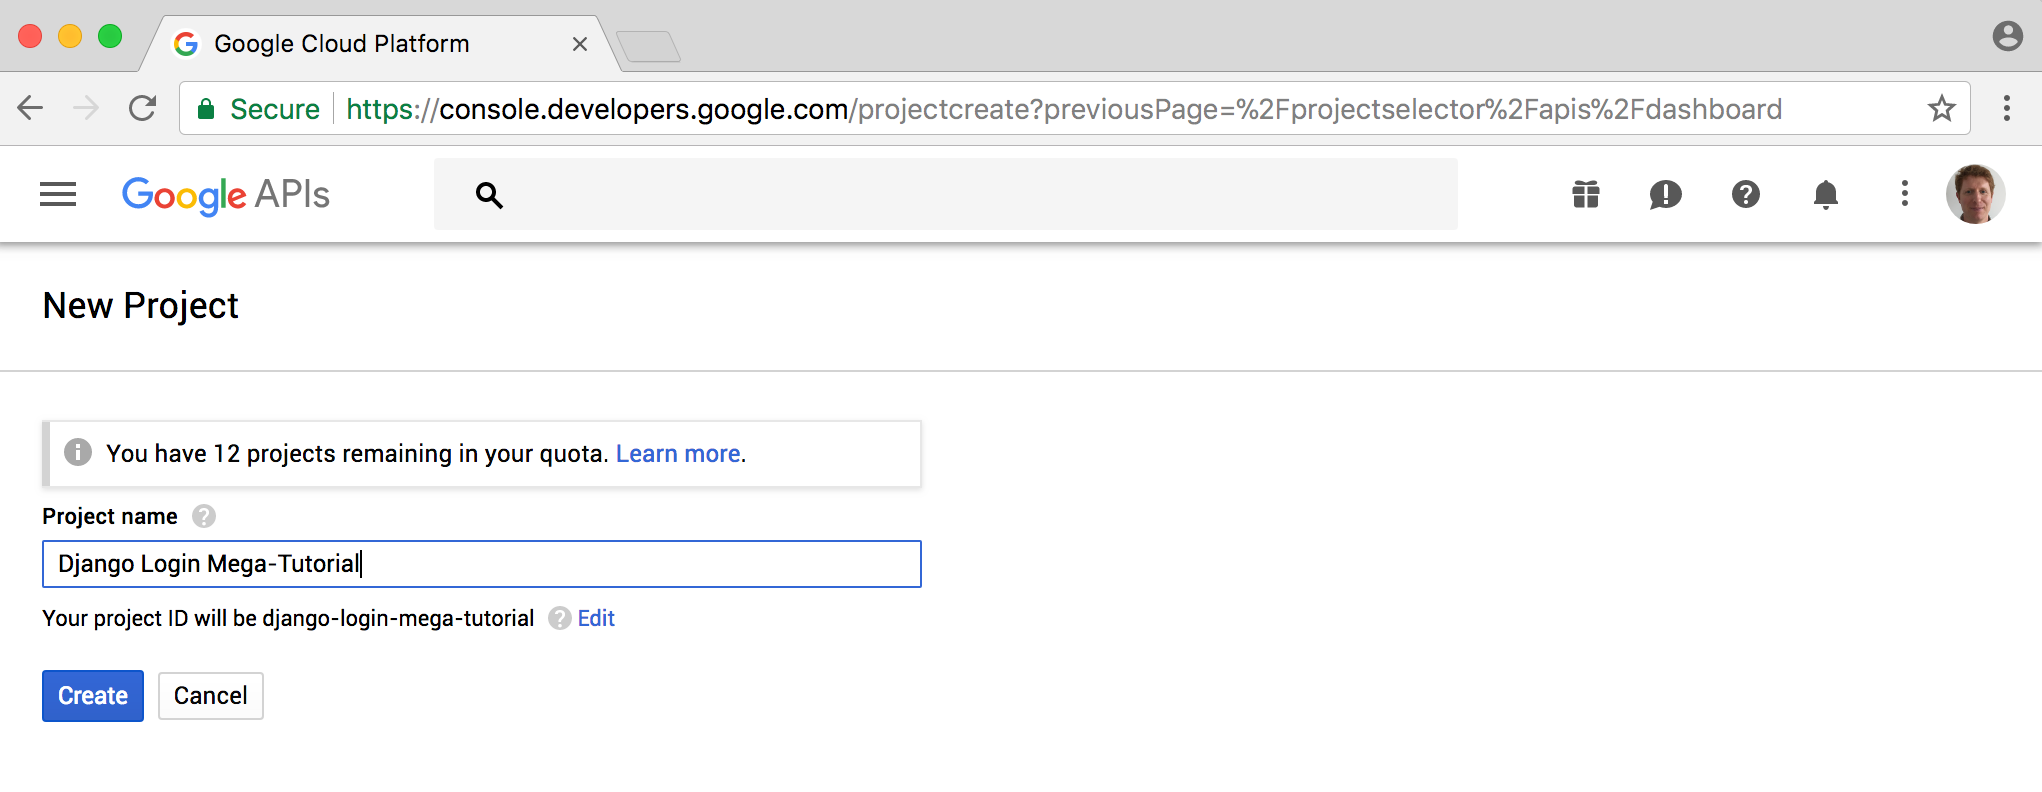
You’ll be sent to the Google “API & Services” page. We want to use Gmail so click on it.
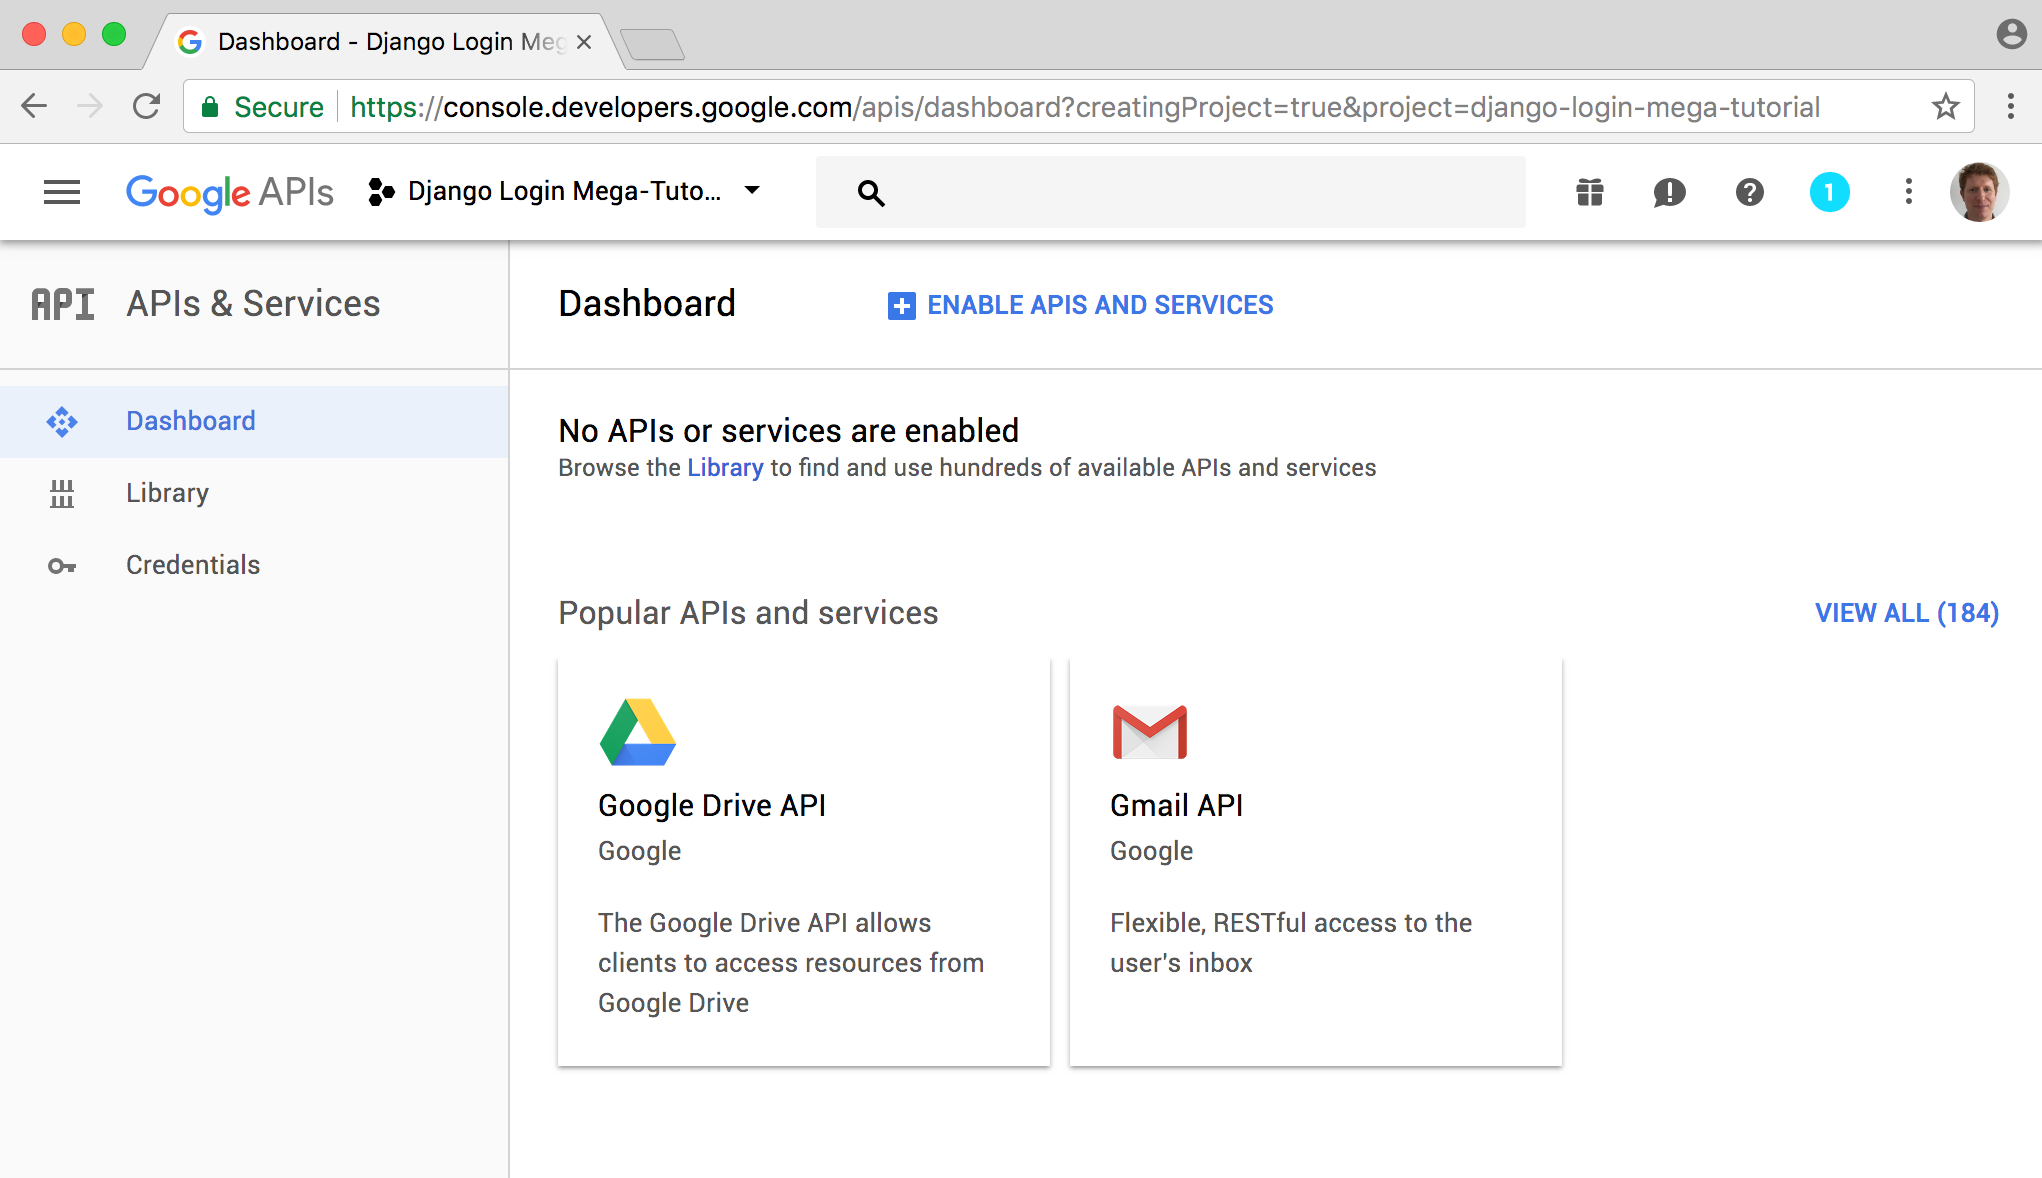
The next screen shows all the details of the Gmail API. Click on the “Enable” button.
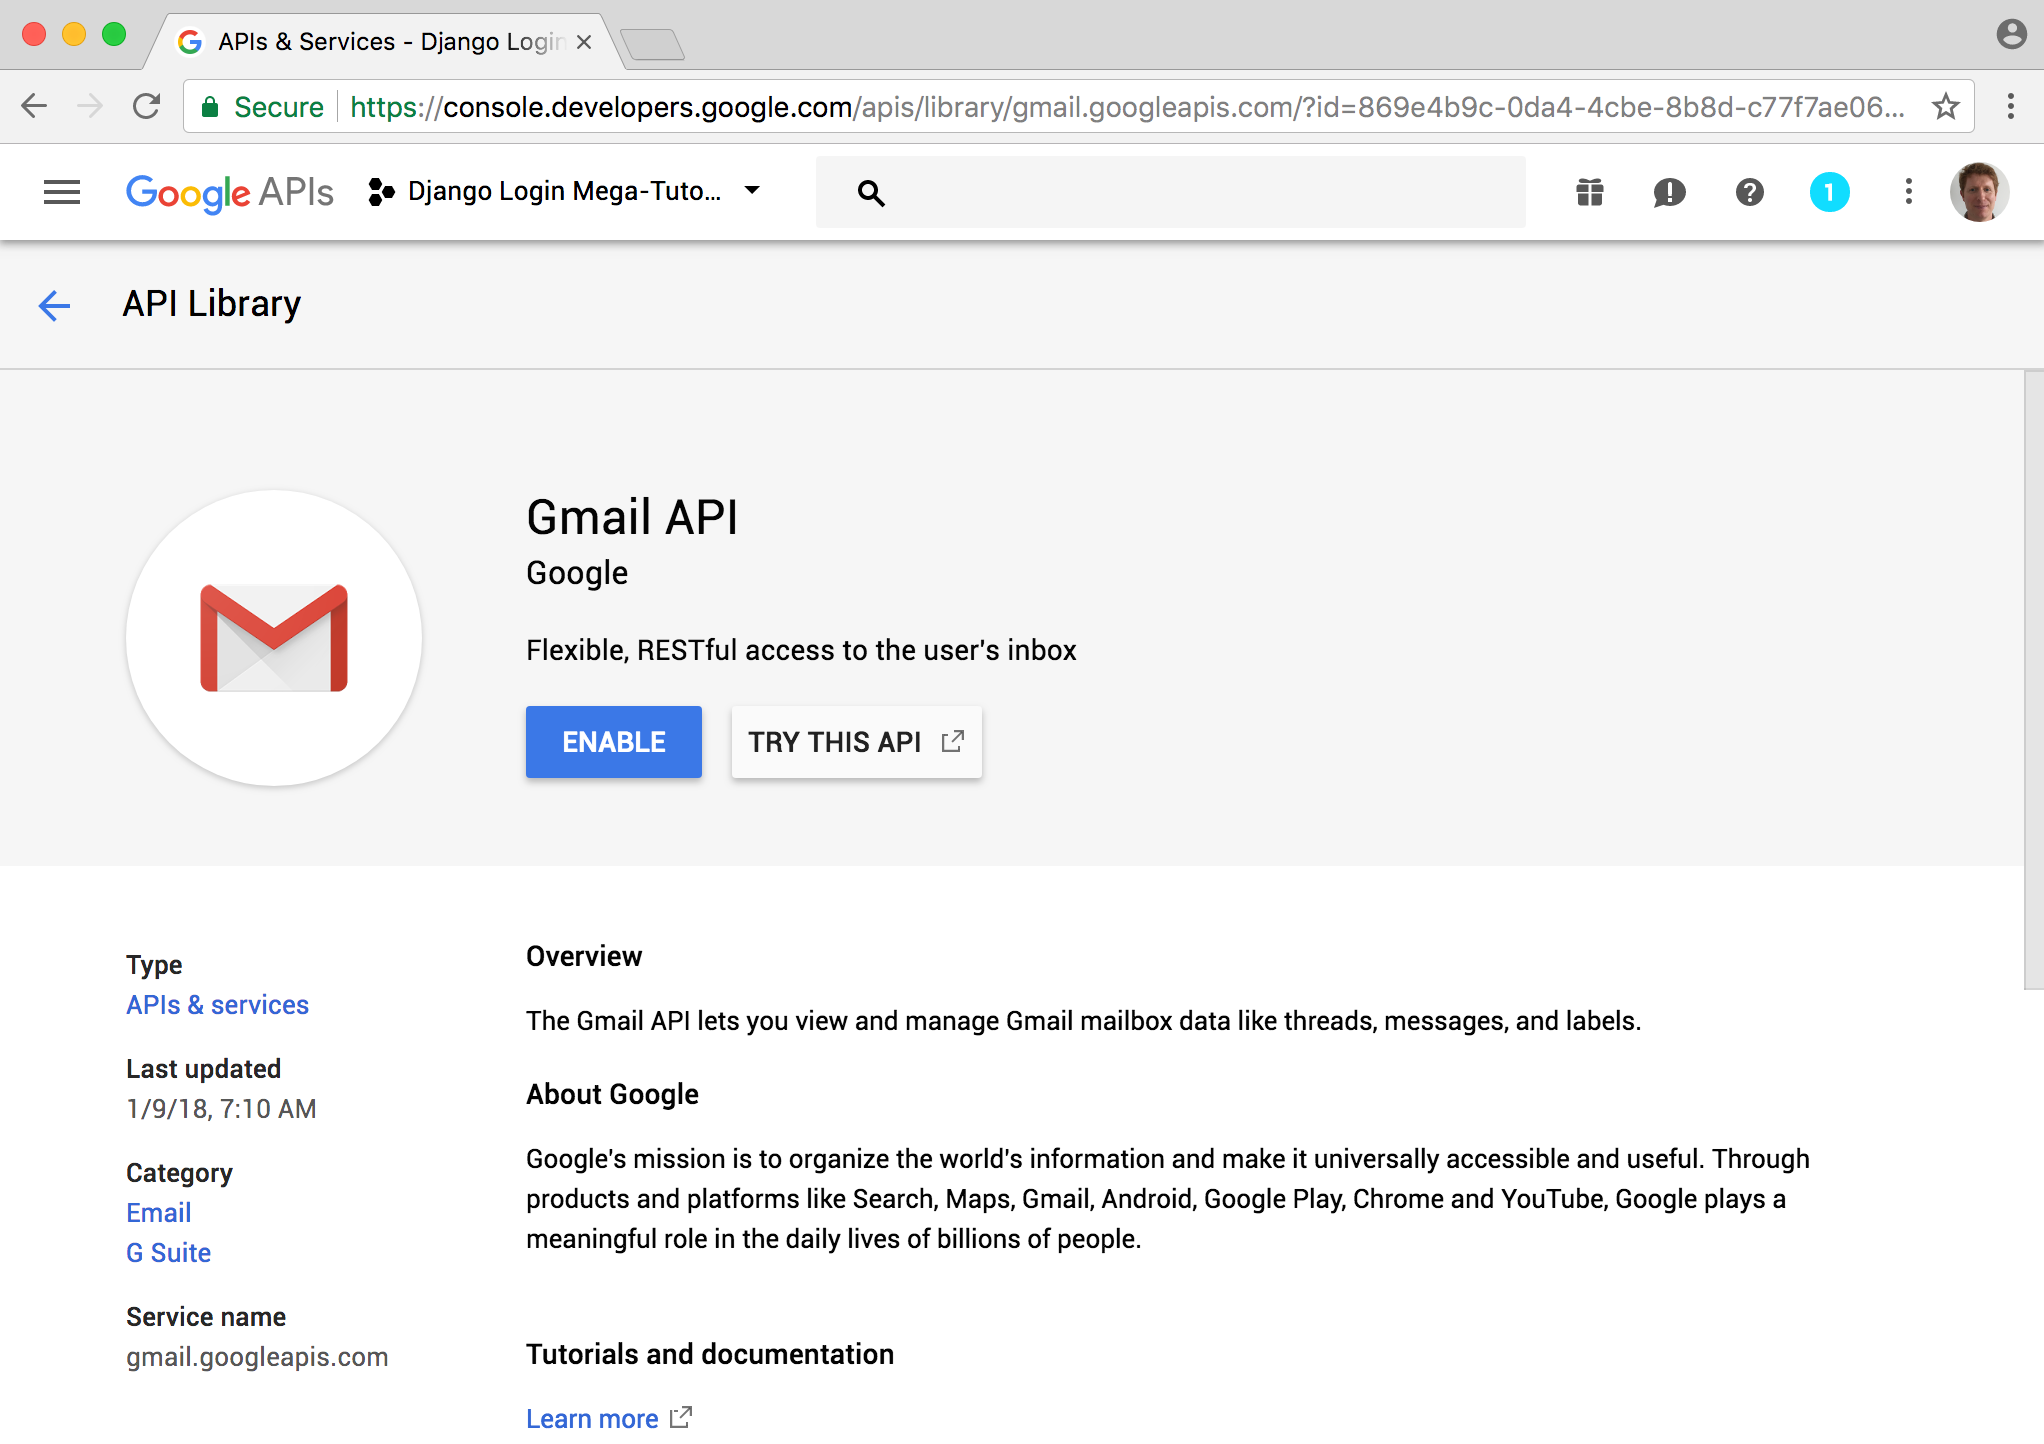
You may be asked for credentials at this point.

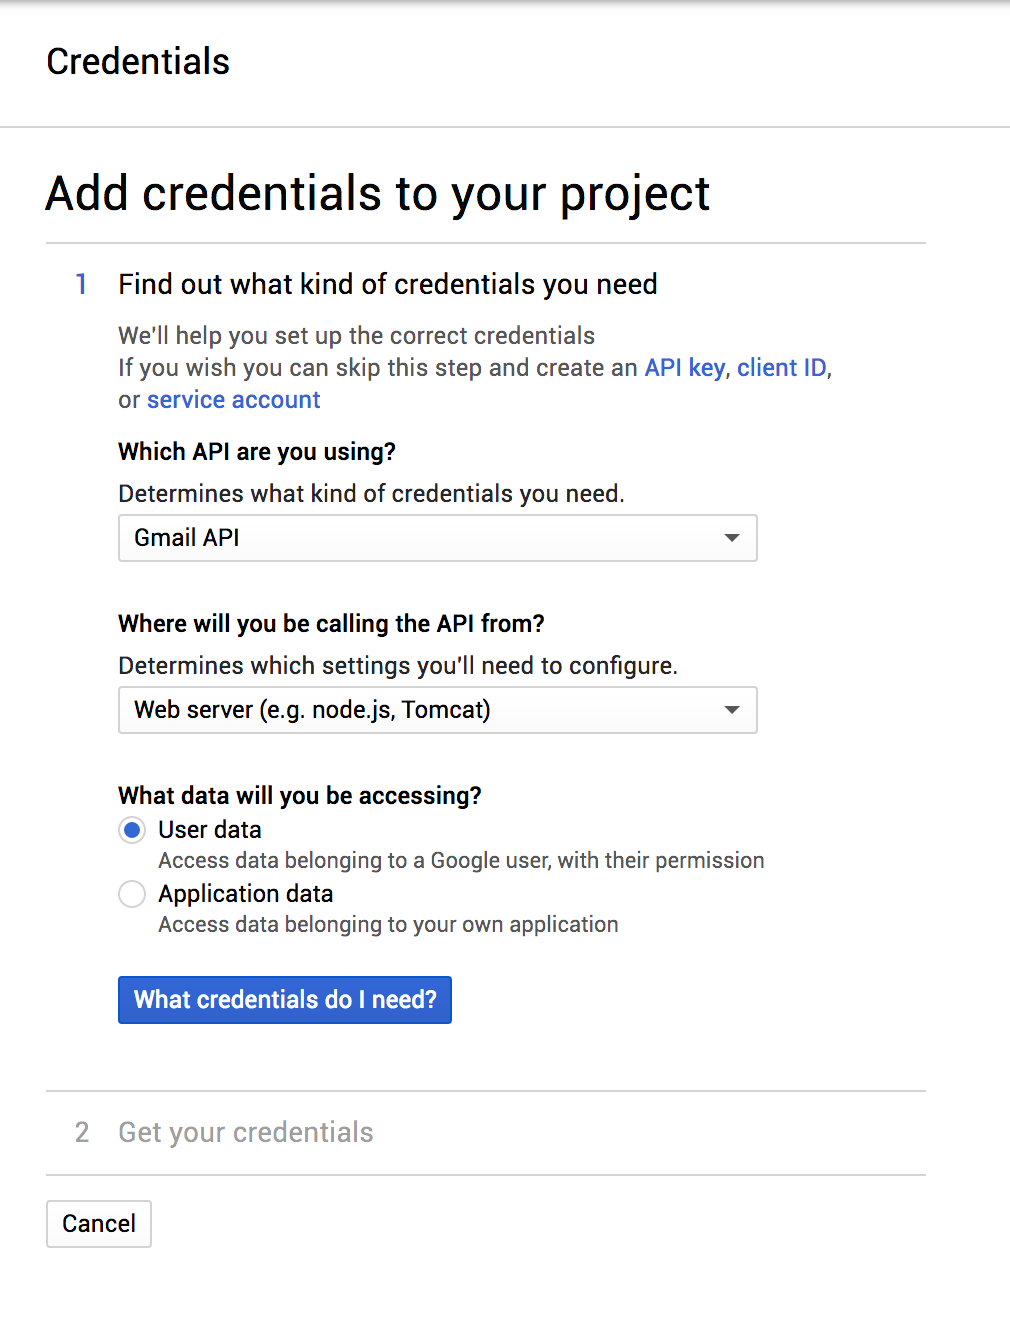
If so click on the “Create credentials” button. Make sure the fields are correct that we’re using the “Gmail API” with a “Web server” and accessing “User data.” Then click “What credentials do I need?”
Step 2 is to add a Name and Authorized Redirect URLs. The name I’ve just repeated the name of my overall project here. The redirect URL should be
http://127.0.0.1:8000/accounts/google/login/callback/. Then click on the “Create client ID” button.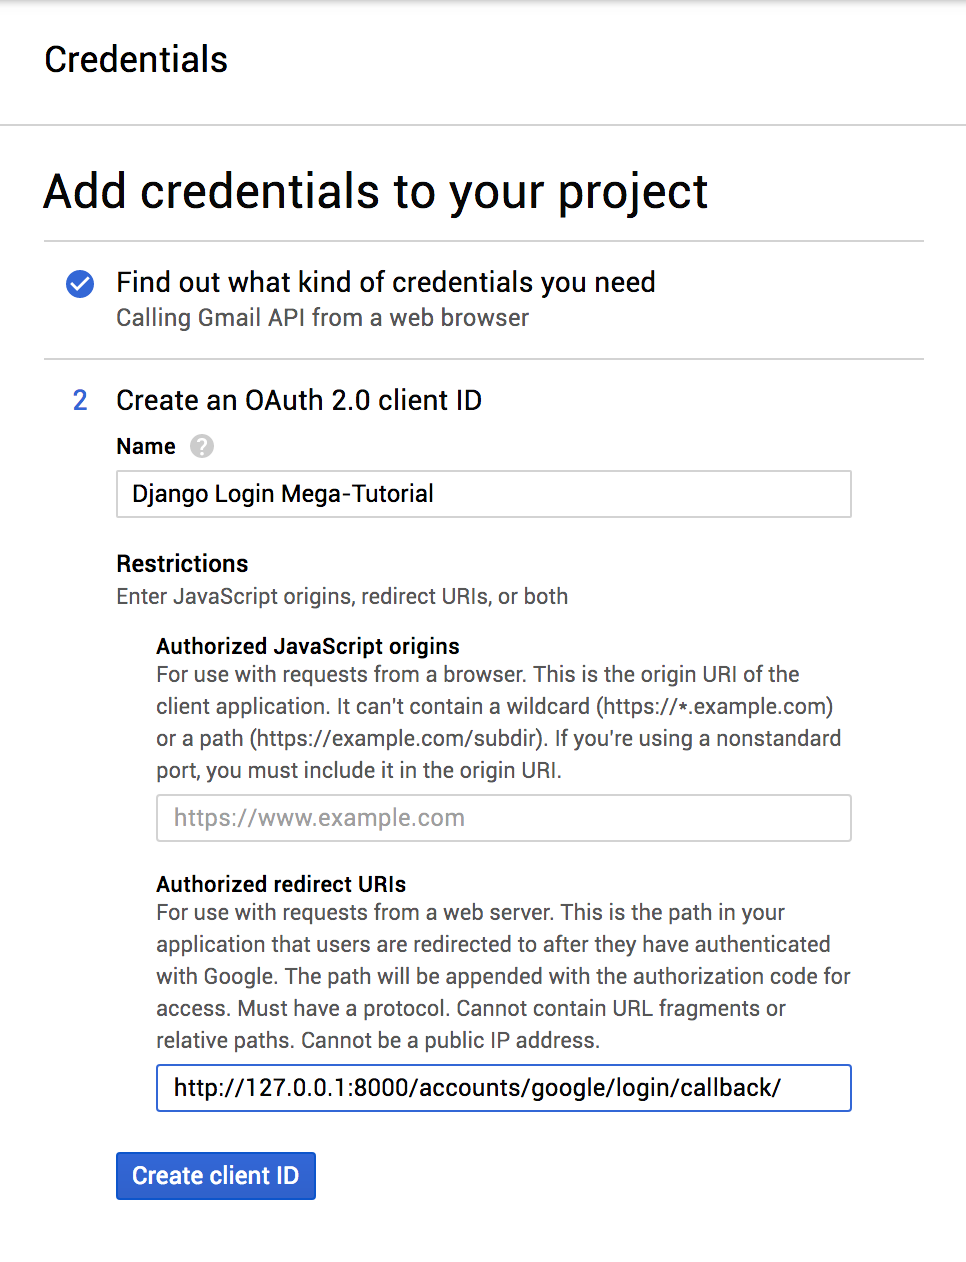
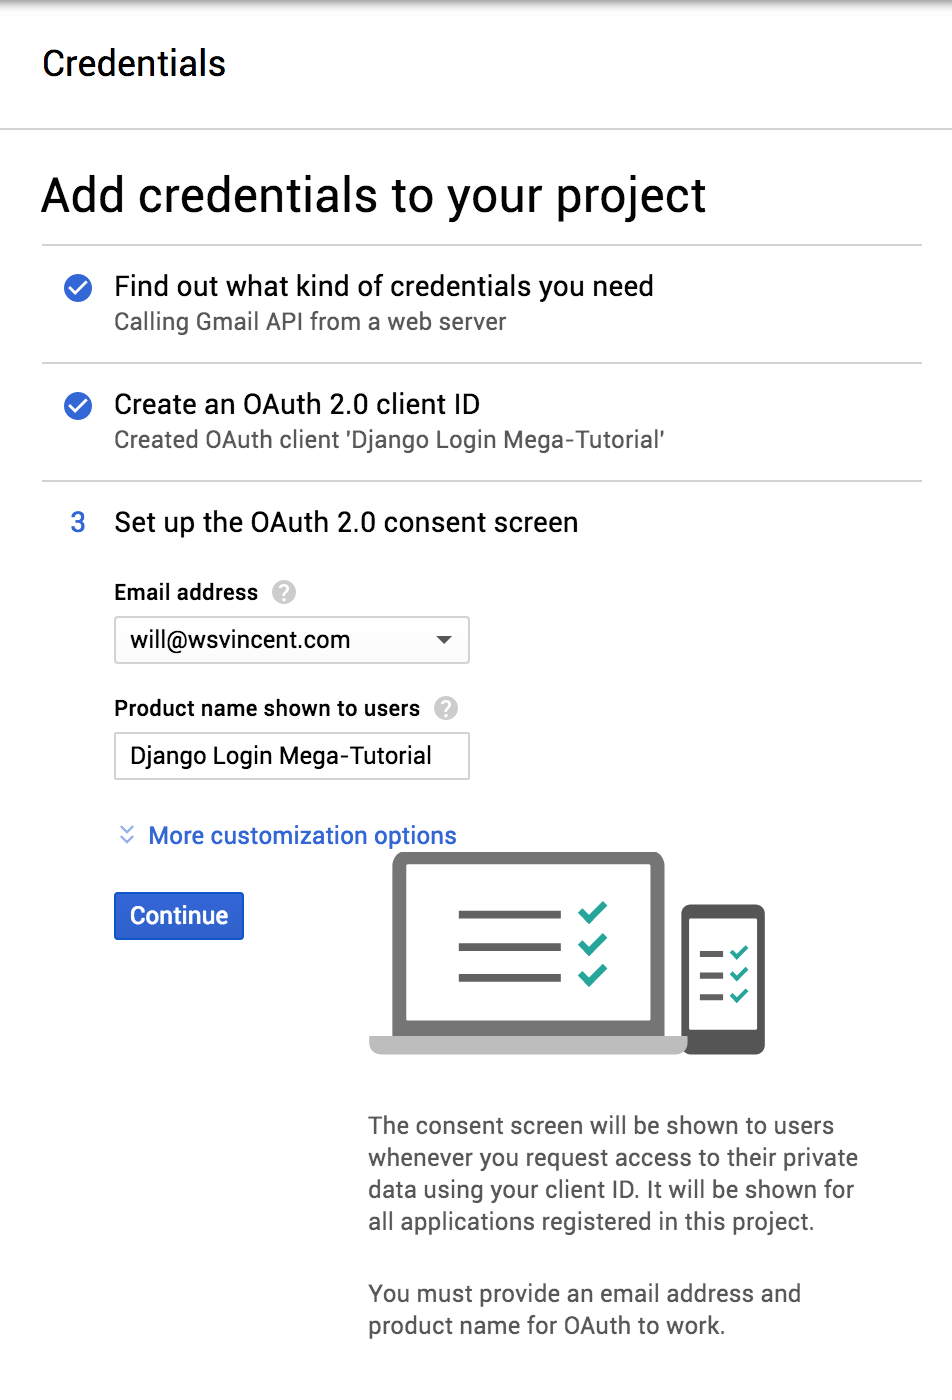
Third and final step is to configure the consent screen. This is the information shown to users after they click on the login button. They’ll be redirected to a Google site that shows the Product name and asks if the site has permission to access their Google account.
Now we have what we want: a client ID (I’ve hidden mine in red). I recommend downloading it and storing somewhere secure. You don’t want this information public.

Now we can configure the Admin which will be much quicker. Go to the Admin site http://127.0.0.1:8000/admin and notice Allauth has added a number of new sections for us.
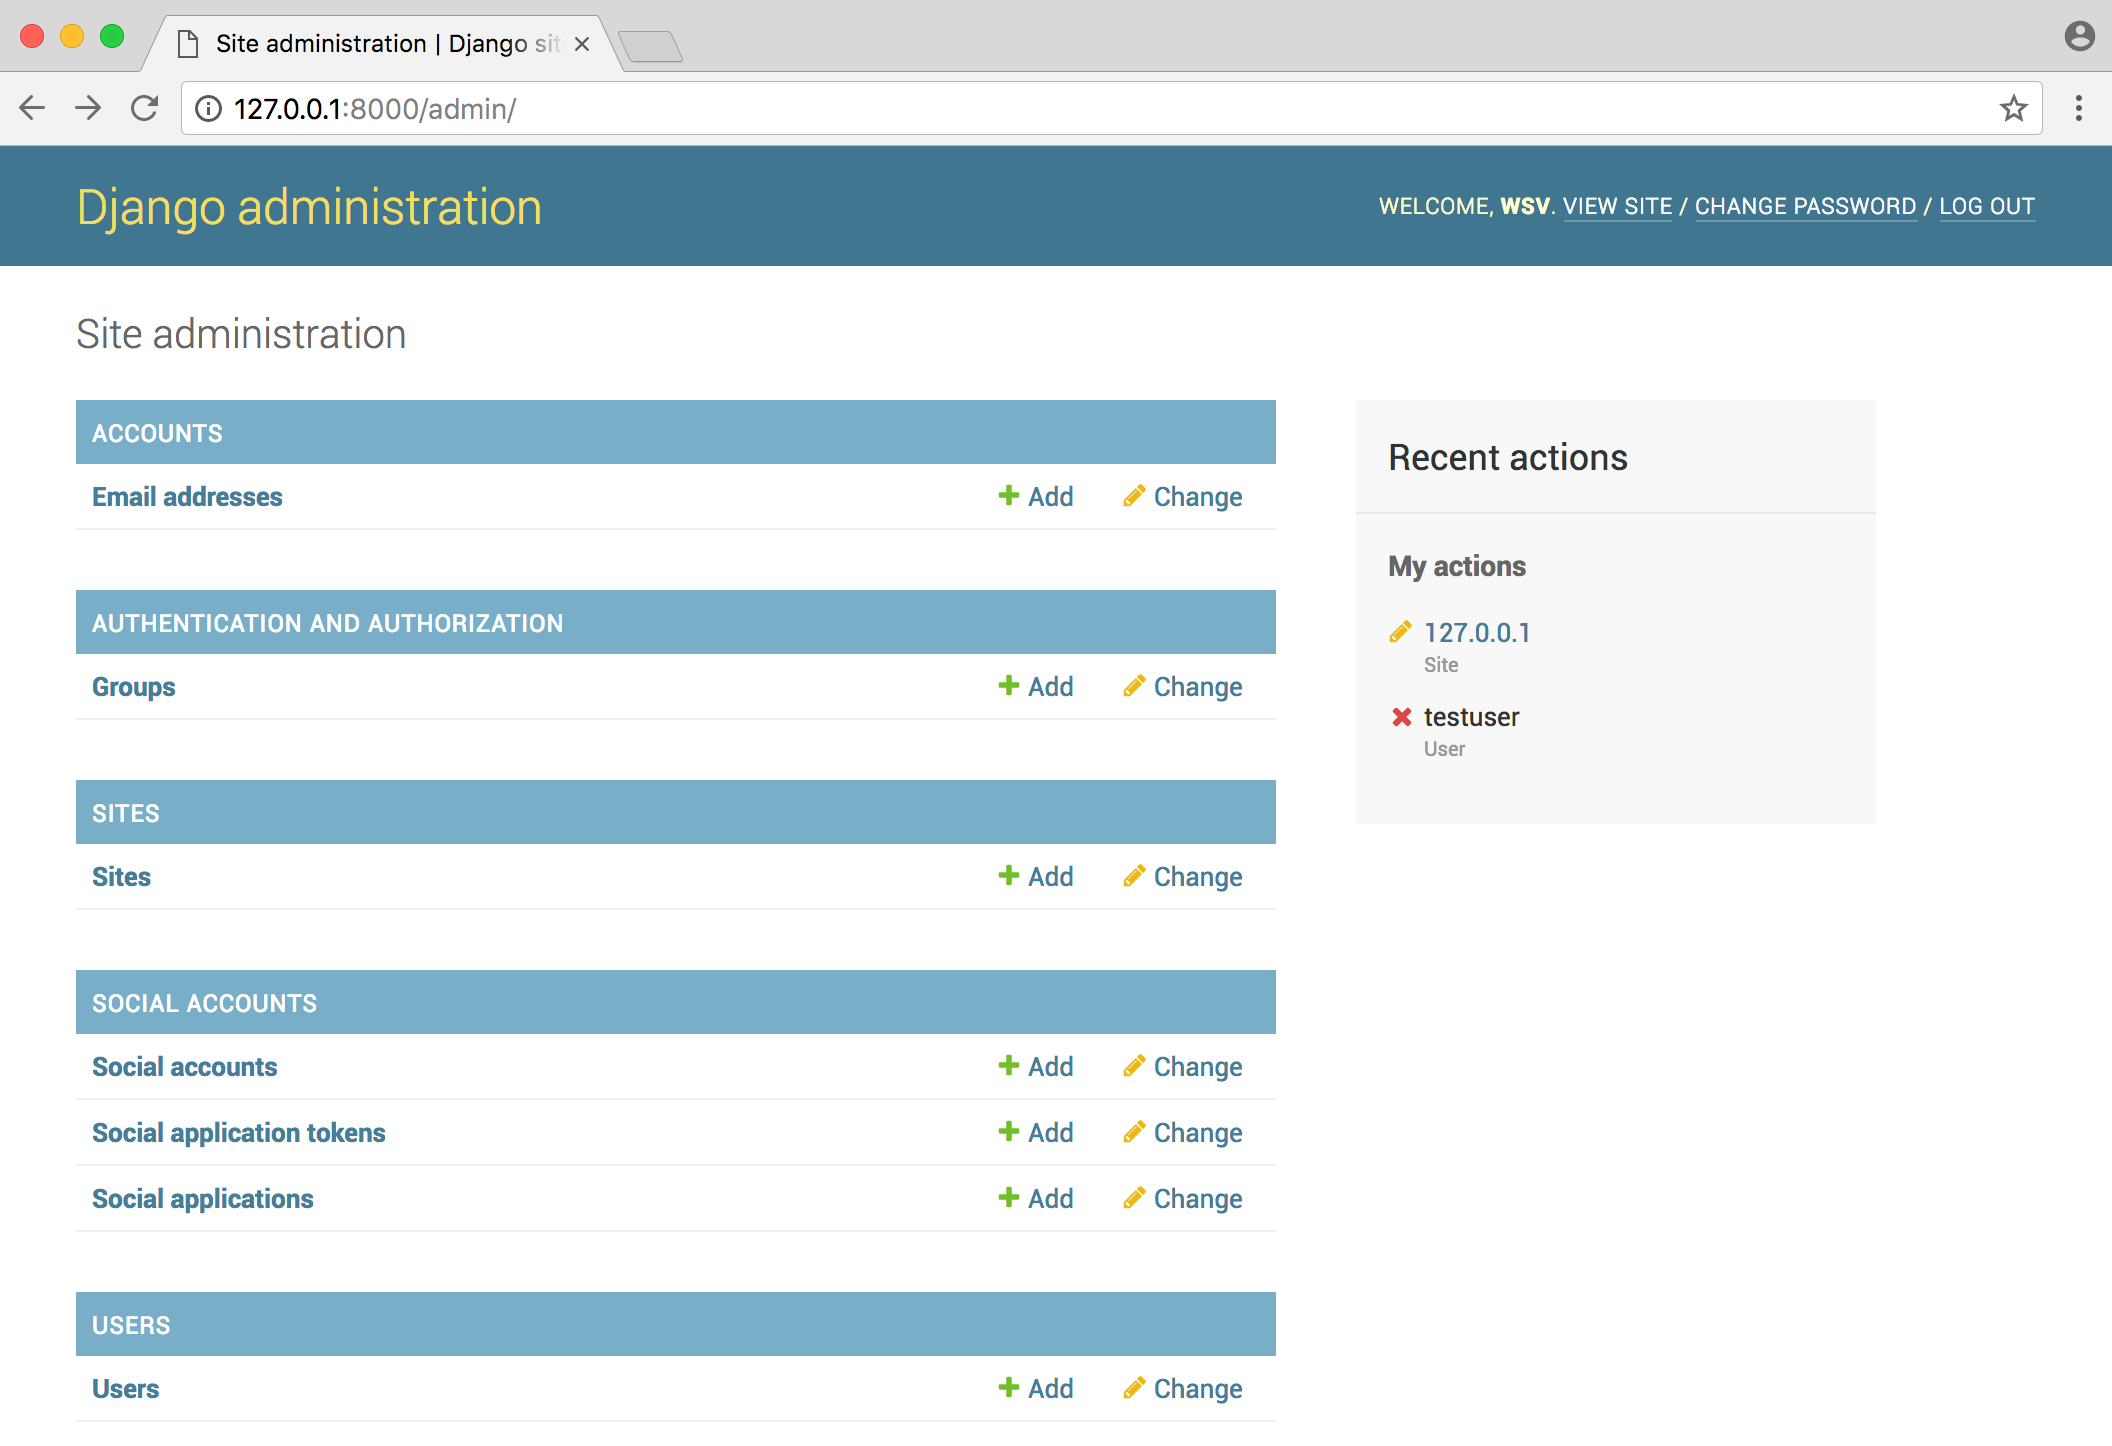
Go into “Sites” on this page.
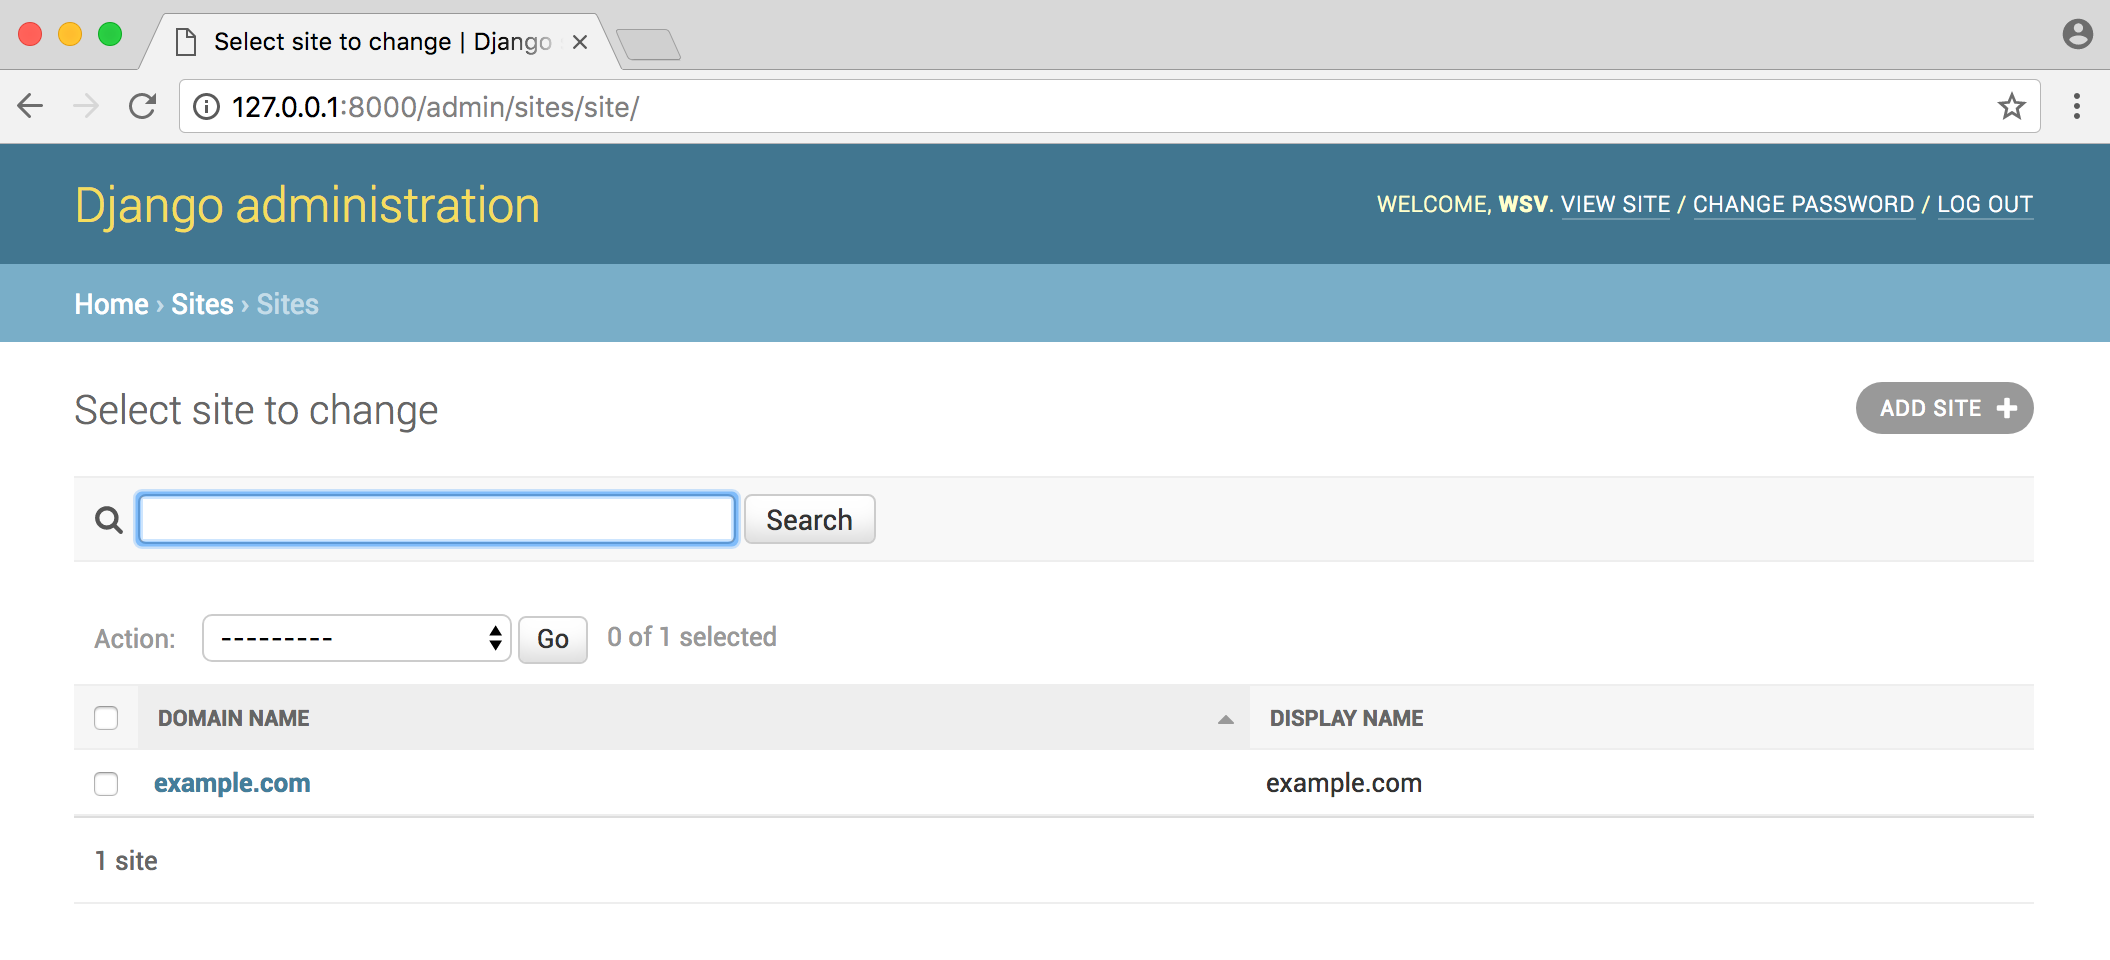
Click on the existing Domain Name of “example.com”. Update it so the “Domain name” is
127.0.0.1.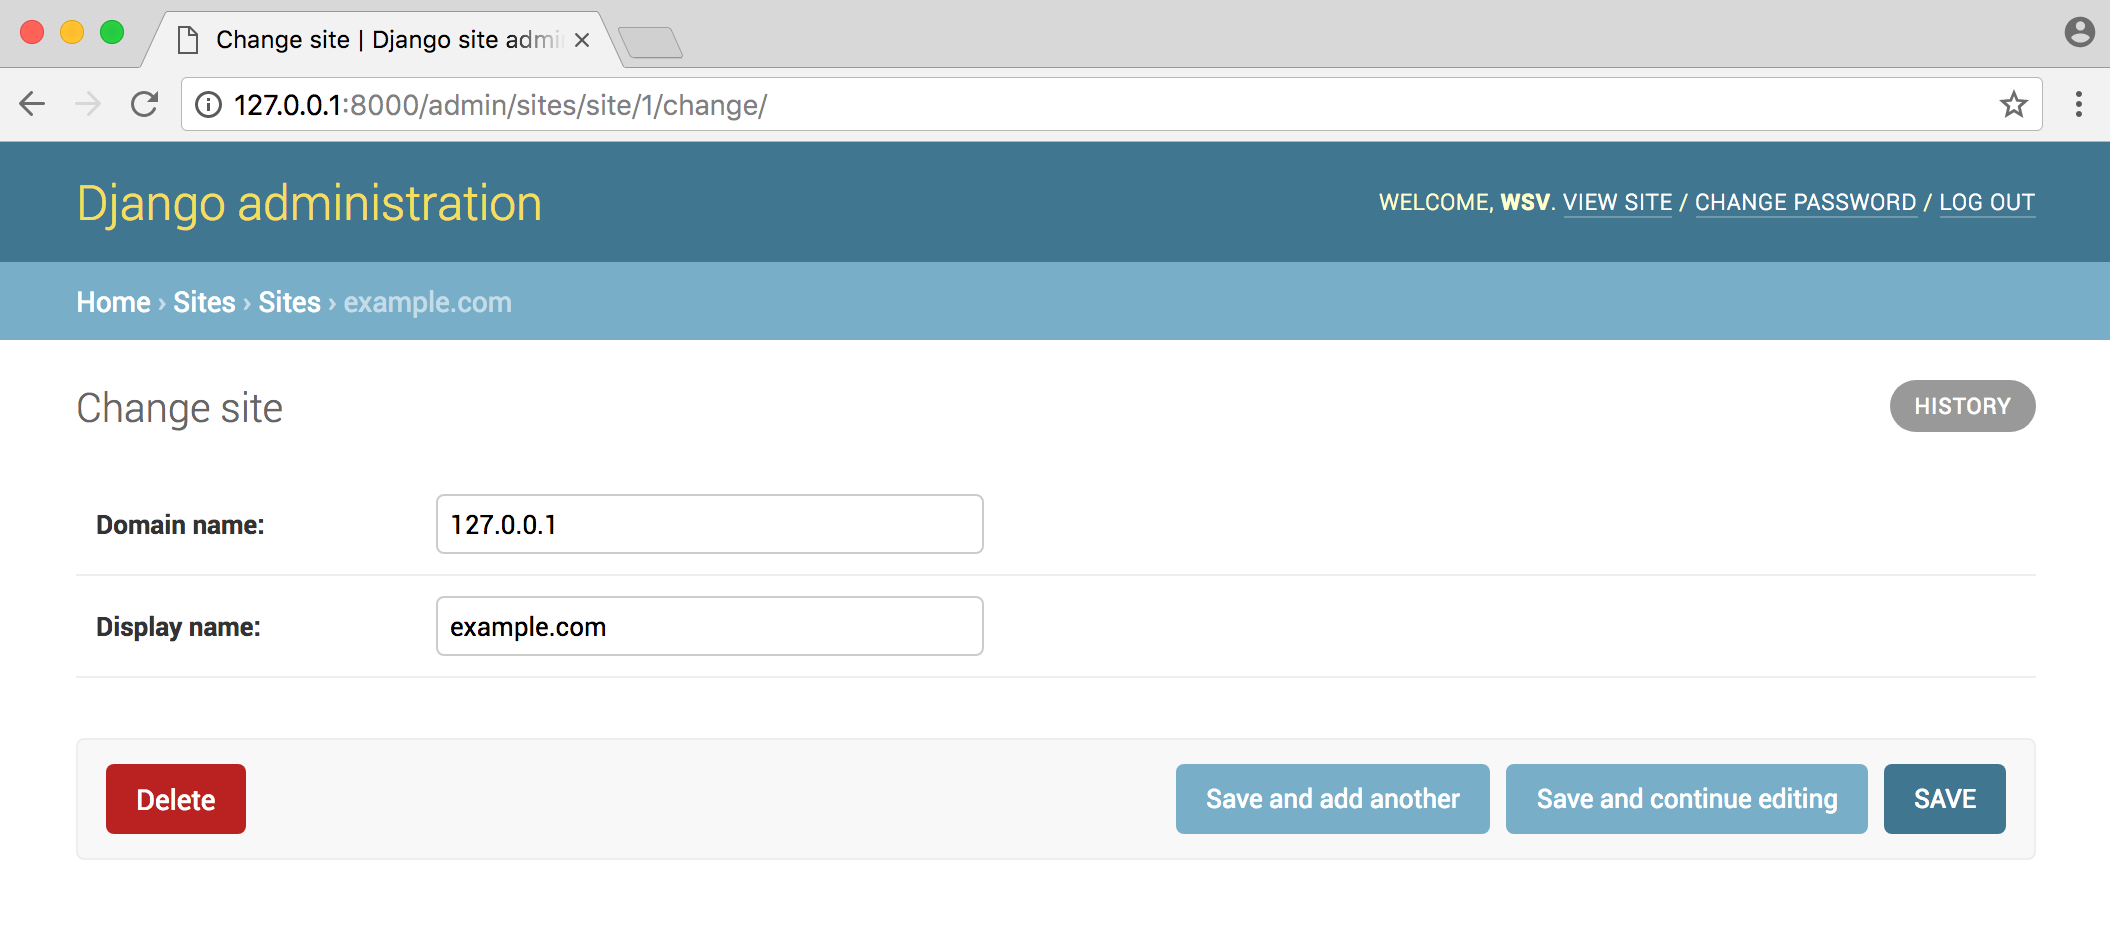
Click save.
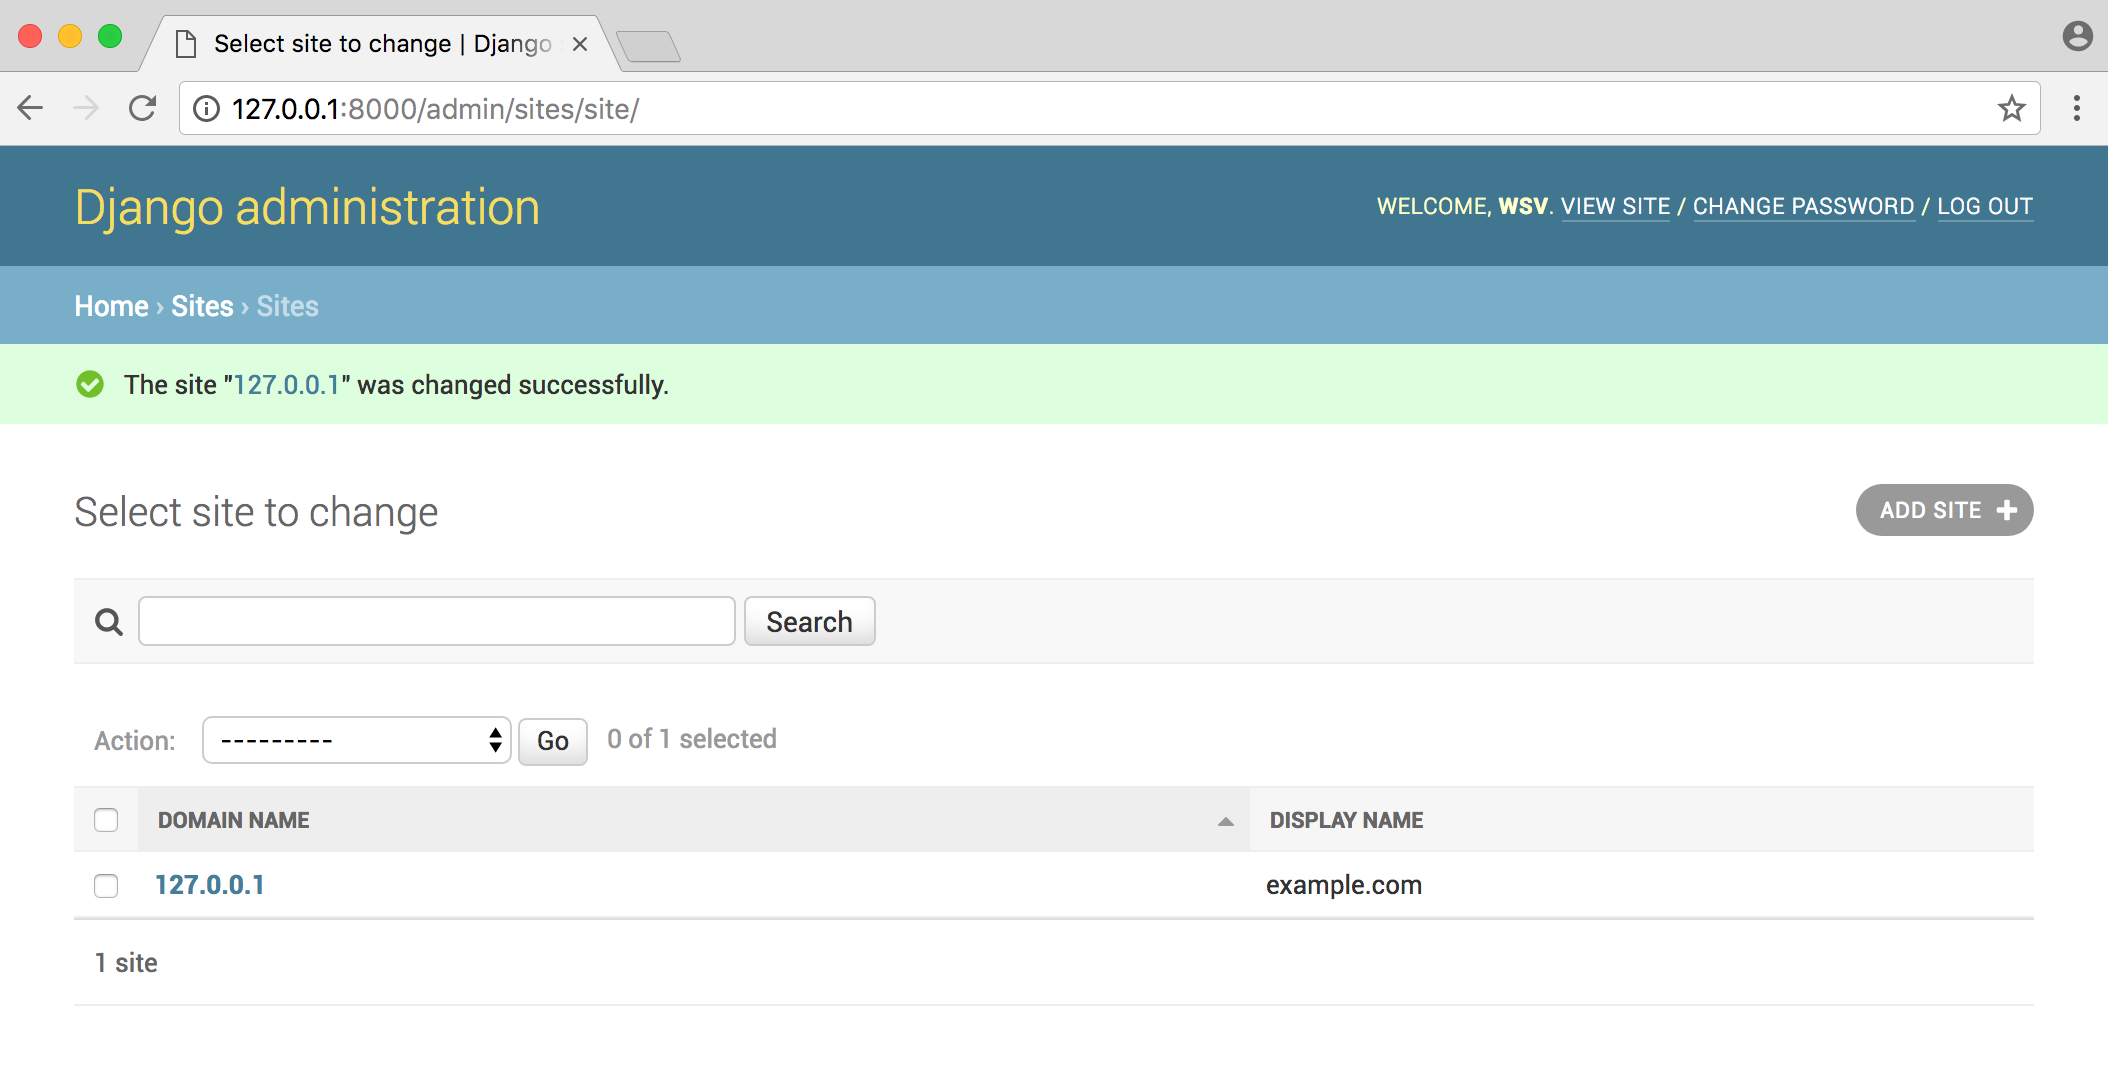
Now for each third-party application we want to add we just need to click on the “Add” button next to “Social applications” under “Social Accounts.”
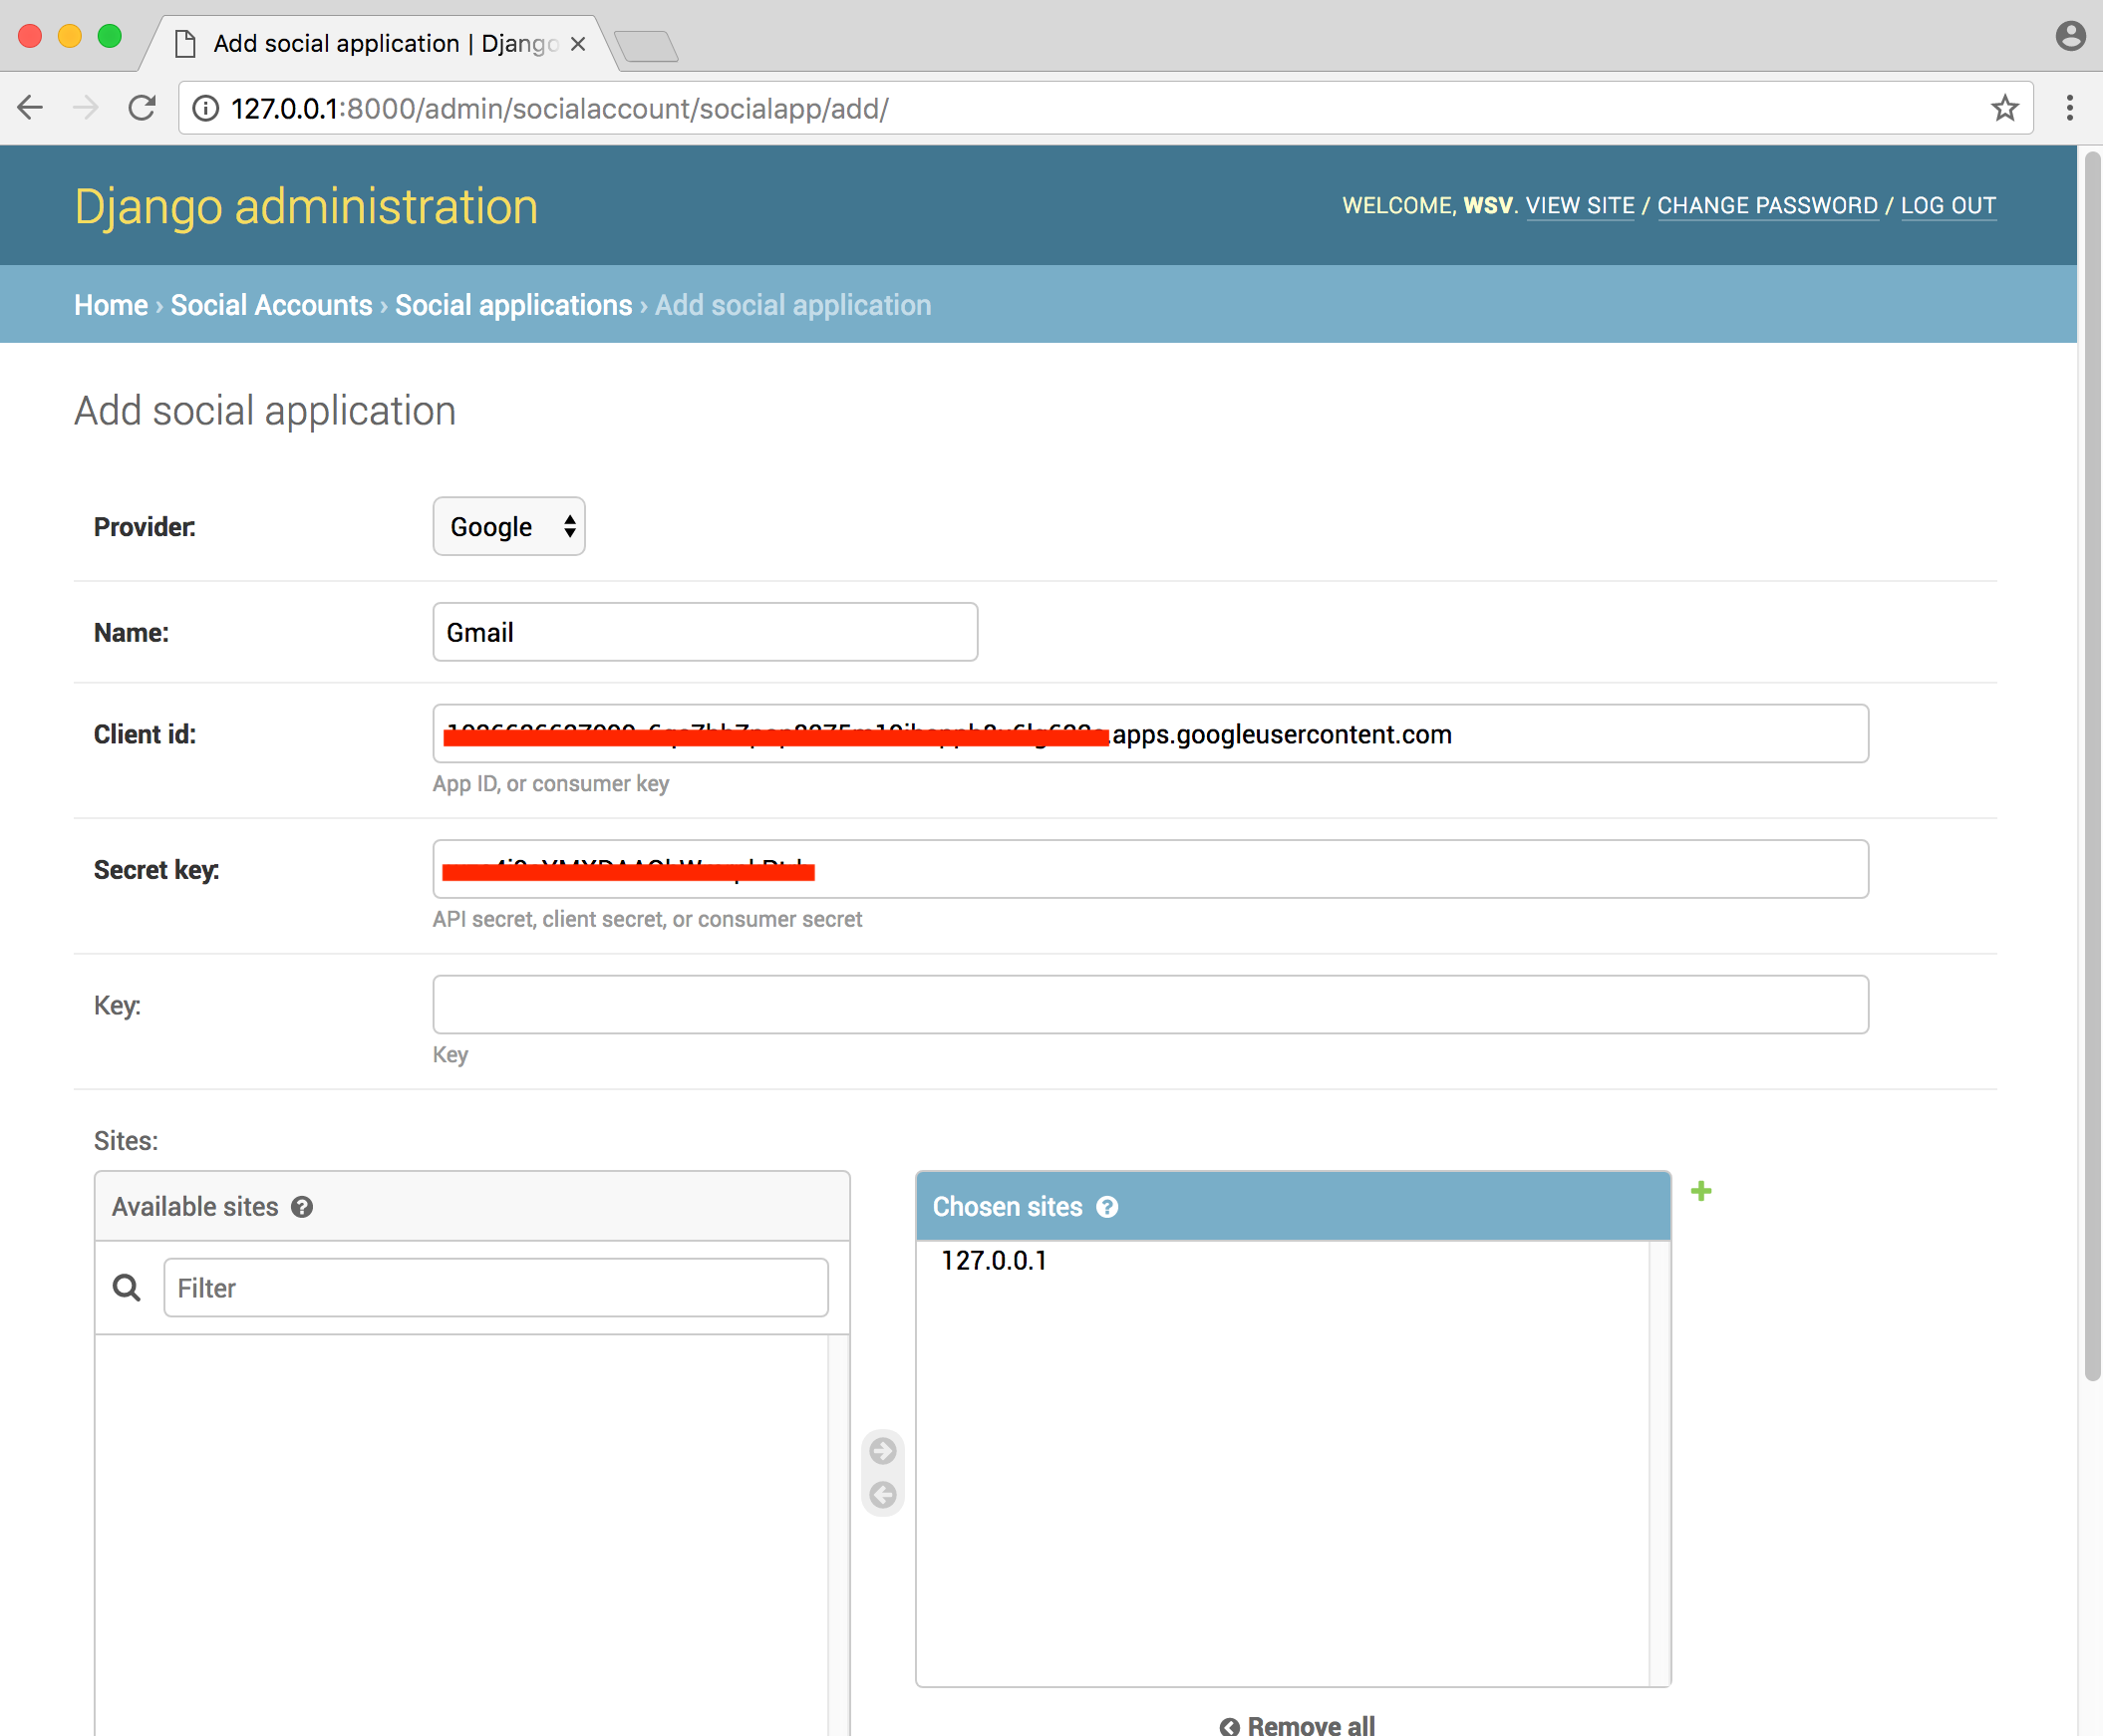
On this page we need to select the provider (Google), provide a Name (Gmail), a Client ID, and a Secret Key. If you downloaded your API keys previously and open the file with a text editor you’ll see it is in JSON format and has both your Client ID and Client Secret. Enter both in here. Finally on the bottom of the page under “Sites” select “127.0.0.1” and click the -> arrow to add it to the Chosen Sites section. Now click on the “Save” button in the lower right of the screen.
Update Templates
The last step is to update our templates file. We need to load
socialaccountwhich comes from Allauth. And our named URLs are slightly different as well: we add an account_ in front of the existing logout, signup, login links. Finally we add a provider link for Google.
The updated
home.html file should look like this:<!-- templates/home.html -->
{% load socialaccount %}
<h1>Django Login Mega-Tutorial</h1>
{% if user.is_authenticated %}
<p>Welcome {{ user.username }} !!!</p>
<p><a href="{% url 'account_logout' %}">Log out</a>
{% else %}
<p><a href="{% url 'account_signup' %}">Sign Up</a></p>
<p><a href="{% url 'account_login' %}">Log In </a></p>
<p><a href="{% provider_login_url 'google' %}">Log In with Gmail</a></p>
{% endif %}
Now try everything out. Go back to the homepage at http://127.0.0.1:8000/. You’re probably logged in so click on the “Log out” link.

What we see is the default Allauth logout page. We can configure it but won’t here. Click on the “Sign Out” link.
Now we see our new homepage with three links.

Click on the “Log In with Gmail” link. Then we’ll see Google’s login page. I’ve used my
william.s.vincent@gmail.com account here since we don’t want duplicate email addresses in our database.
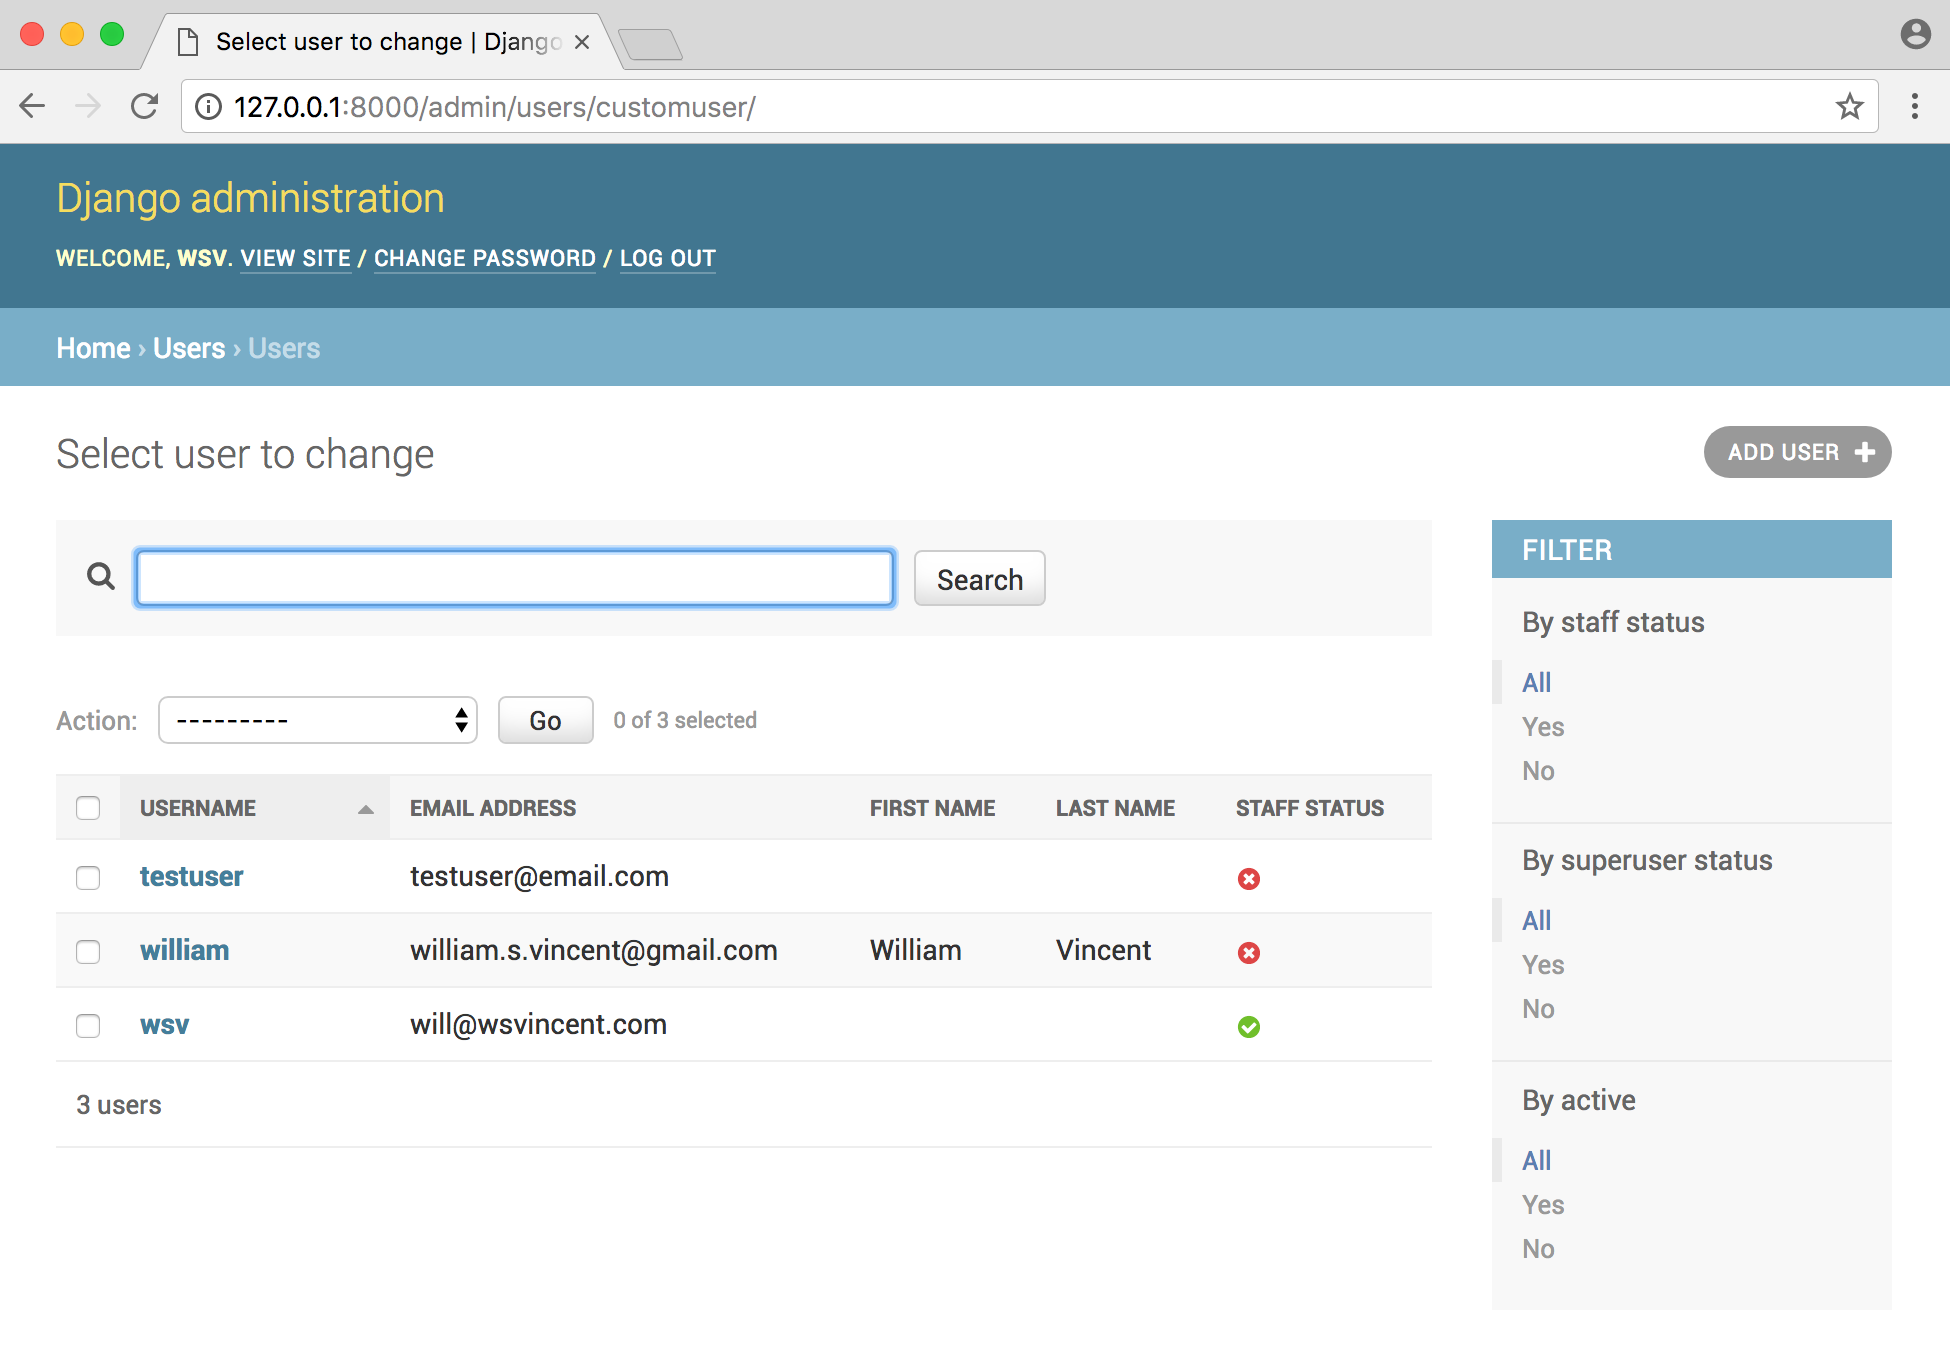
Now navigate to the “Users” section of the admin at http://127.0.0.1:8000/adminand we can see both our new user and his/her email address.
Next steps
That was a bit of work eh? In exchange for all our effort we have complete control over the user authorization process now. We can add additional fields to
CustomUser; we can add additional 3rd party logins; and we can override Allauth default templates.
Comments
Post a Comment